


Transplanting Cannabis 101: All You Need To Know

Weed is just like any other plant: sometimes, it outgrows its home. That’s where transplanting comes in. Whether a grower keeps their marijuana plants indoors or outdoors, transplanting is an important technique for any cannabis cultivator. However, it’s not always easy. That’s why we’ve compiled some vital information about transplanting here for you!
Why Should I Bother Transplanting?
Often, new growers overlook transplanting as an optional step in the growing process. They may think they can just skip this process to save time and effort. However, it’s actually a critical part of the plant’s lifecycle. On-time transplantation ensures steady development of the root system – the health-center of cannabis. In short, a weed plant needs to be in the right-sized container. Containers that are too big or too small invite a host of problems. The end result? Sick, root-bound plants with low-quality buds and pitiful yields. Don’t let that happen to you!
When Should I Transplant My Marijuana?
An experienced grower knows that they can’t just transplant their cannabis randomly. Instead, there are several ways to determine when to transplant weed. For example, a plant may give signs that it needs to be transplanted. Growers can tell by the number of leaves on a plant or the development of its roots. Additionally, they may choose a specific time to transplant, such as during the late vegetative phase.
Looking At The Leaves

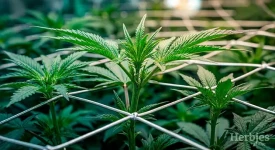
When transplanting young marijuana plants, keep an eye on leaf development. Young plants should start off in small containers until they’ve sprouted between four and five sets of leaves. Remember that this doesn’t include the cotyledon (the first two leaves to sprout after a seed germinates). Once a plant develops its first few leaves, its root system will have outgrown its initial container. Transplanting at this point will help you prevent your plants from becoming root-bound.
Judging By Root Development

If a young plant’s roots begin peeking out of the bottom of its container, it’s time to transplant. Pay special attention to the color of the roots – they’ll give you an idea of how healthy the plant is. Bright white roots indicate a healthy plant that’s growing quickly. They may even look hairy as smaller roots branch off from the main ones. However, if the roots appear yellow or brown, they’re getting sick and you’ll need to transplant them as quickly as possible.
Transplanting In The Late Vegetative Phase

Many growers schedule transplanting for the late vegetative phase. The best time to do this is in the final 2 weeks of a plant’s veg cycle. During this time, roots are rapidly growing and seeking new soil. If a gardener transplants in this window, they’ll see their plants grow exponentially over just a few days. Using this technique, a grower can transplant their cannabis preemptively and avoid any problems before they arise.
Root-Bound: What Does It Look Like?

If a grower leaves a plant in a container that’s too small for too long, it can become root-bound. A root-bound plant will exhibit symptoms like slow growth. It will also develop wilting, yellowing leaves. When a plant is root-bound, its root system runs out of room and it begins to grow inward on itself. As a result, the roots can’t get the mixture of water air, and nutrients they need to grow. The only way to cure root-bound marijuana plants is by transplanting them into bigger pots.
Transplanting: Indoors Vs. Outdoors
There are many scenarios where you’ll need to decide whether to grow inside or outdoors. Transplanting is no different. There are several factors that a grower needs to consider when transplanting their marijuana plants from one pot to another or directly into the ground.
Cultivating an indoor garden allows a grower to have more control over their plant’s environment. Conditions like temperature and humidity will have a significant impact on how a plant’s roots develop, so controlling them is key. However, growing marijuana outdoors can have some advantages. If your plants are especially large, transplanting them outside will allow you to utilize the sun and give you infinite vertical space to grow. Just make sure your outdoor grow area is secure!
Proper Transplanting Procedures
Transplanting is one of the most stressful processes a plant can experience. Its roots are exposed to the air, leaving it vulnerable to a multitude of problems. Growers must dial in their humidity and temperature to protect their roots. Generally, roots like temperatures around 70 degrees Fahrenheit (21 degrees Celsius) and about 70% relative humidity.
Transplanting Seedlings

Regardless of whether you pop a new plant from seed or cut clones from a mother, you’ll need to transplant seedlings. Once a seedling begins to sprout healthy, white roots from the bottom of its seeding plug, it’s ready to move on to a bigger container. Young plants require small containers. Garden stores sell small plastic containers with holes for drainage. These are the perfect size for seedlings to develop their roots. In contrast, a grower with a DIY attitude can simply transplant their seedlings into a red solo cup. If you do this, remember to cut holes in the bottom of the cup for drainage! To transplant a seedling into its new home, fill your container with a few inches of soil. Then, dig a hole up to your knuckle and place the seedling plug into the hole. However, your work isn’t done yet. After the seedling’s leaves begin to reach the edges of your container, it’s time to transplant them once again.
That’s Not It! Transplanting Plants Later In Veg

After your plant outgrows its first home, it will need a new one. This can happen very quickly – often within just a few days. Therefore, it’s vital for growers to keep a close eye on the development of their young plants. Transplanting is a multi-step process. First, you’ll need to decide how big your next container will be. You can choose a one, two or three-gallon pot depending on the maximum height of your garden. The greater your garden’s maximum height, the bigger the pot can be. Next, fill the pot with soil. Then, dig a small hole large enough to fit your plant’s root ball. At this point, you’ll need to remove your plant from its first container. You can squeeze the sides of the container and push the bottom to make the root ball pop out, or you can just use scissors to cut away the container. After that, place the root ball into the hole. But don’t get too excited – you’re not done just yet!
Transplanting Into Finishing Containers
If you’re growing big plants, you may need to transplant again. After your plant doubles in height, you need to transplant it into a finishing container. Use the same process as your previous transplants. You’ll want to do this before you switch your plants into a flower cycle (12 hours of light and 12 hours of darkness). In general, transplanting flowering marijuana plants is not a good idea. Transplanting marijuana plants during this stage can lead to significant releases of stress hormones. As a result, your plant may turn from a female into a hermaphrodite. If that happens, the plant will stop producing THC and will focus on procreation. The only time you should be transplanting flowering marijuana plants is if they’re root-bound.
Useful Tips And Tricks
Here are a few tips that you can apply whenever transplanting weed:
- Water between 1 and 2 days before transplant.
- Water plants immediately after transplanting. This will encourage roots to grow.
- Using bat guano is a great way to boost the growth of marijuana plants when transplanting. It’s high in nitrogen, which is an essential building block for young plants.
Final Comments
Using these techniques, you can ensure your plants remain healthy during the transplanting process. Transplanting correctly can also ensure that your plants always have enough room to grow and will maximize their size. Remember: bigger roots, bigger chutes, bigger fruits. Now that you have a basic understanding of how to transplant marijuana plants, you’ll be able to apply this process in your own garden!

Herbies Head Shop expressly refuses to support the use, production, or supply of illegal substances. For more details read our Legal Disclaimer.
- Shared on Twitter
![icon]()
- Shared on Facebook
![icon]()


Thank you for leaving a comment for us!
Your feedback will be posted shortly after our moderator checks it.
Please note that we don’t publish reviews that: