How to Scrog Cannabis: Complete Screen of Green Guide
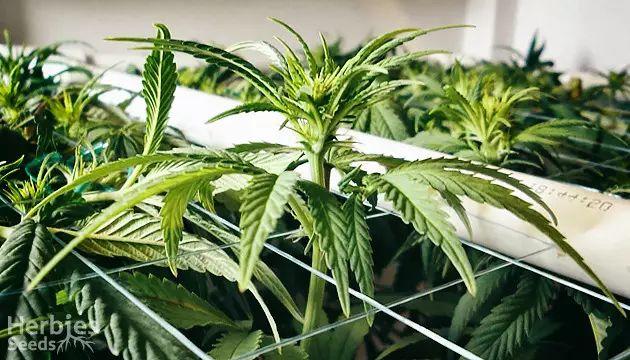
The ScrOG method (Screen of Green) is one of the most effective cannabis training techniques for boosting yields, improving bud quality, and controlling plant height. By spreading branches horizontally with a screen – or even without one – growers create a level canopy where every bud site receives direct light.
In this guide, we’ll explore what ScrOG is, why it works, how to set it up step by step, alternatives like ScrOG without a net, autoflower scrogging, outdoor setups, and companion training methods. By the end, you’ll know exactly how to use ScrOG to get the most out of your grow.
What Is ScrOG?
Left to grow naturally, cannabis plants stretch upwards with one dominant cola at the top. The Screen of Green technique changes this natural pattern. By installing a net or screen above the plants and guiding branches through it, you create a flat canopy where the lower branches are lifted up and the taller ones pulled down.
This even structure comes with several major benefits: more consistent light exposure, better airflow, and more energy directed to multiple strong colas instead of a single main one. The result is healthier growth, improved bud quality, and significantly better yields.
Why Use the ScrOG Technique?
The purpose of ScrOG goes beyond simply training plants – it transforms the way your entire grow functions.
By flattening the canopy, you can hang lights closer to the plants, ensuring each flower receives equal exposure. The improved airflow above and below the screen reduces the risk of mould and pathogens, while the plant itself becomes more efficient at using space. Many growers report up to 20–30% higher yields compared to untrained plants.
In summary, ScrOG delivers:
- Higher yields through more productive bud sites
- Denser, more resinous flowers thanks to uniform light
- Improved airflow, lowering disease risk
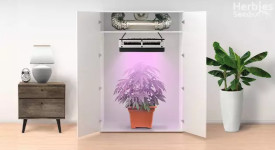
- Better use of space, ideal for small tents or grow boxes
- Height control, making tall Sativas manageable indoors
For many growers, a single scrogged plant can outperform several smaller untrained ones.
Equipment You’ll Need
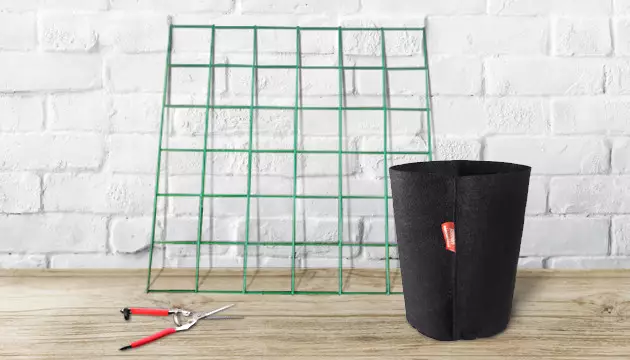
A ScrOG setup might look advanced, but the required tools are straightforward. The goal is stability, airflow, and giving yourself enough control to shape the canopy properly.
- Screen or net: The core of the system. Use nylon, hemp cord, or string. Avoid sharp materials like chicken wire that can cut into stems.
- Frame: Build from wood or PVC pipe to hold the net. A sturdy frame keeps the grid tight and easy to weave through.
- Pots: For one large plant, a 25 L pot works best. For multiple plants in the same ScrOG, use 11 L pots. Fabric pots are especially useful, as they improve root aeration.
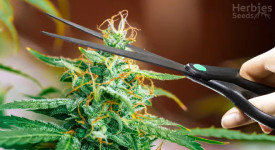
- Scissors: Always keep a sharp, sterile pair for pruning lower growth.
- Supports: Tent poles, stakes, or hooks help keep the screen secure and at the correct height.
With these basics, you can set up an efficient ScrOG system without a big investment.
How to ScrOG Step by Step
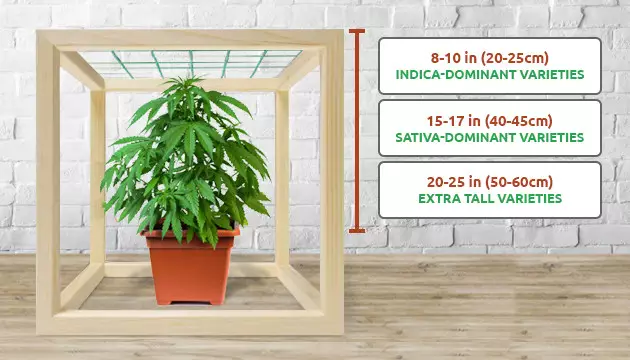
ScrOG isn’t complicated once you know the rhythm. The key is timing – don’t start too early, but also don’t wait until branches harden in late veg.
1. Set up the screen:
Position it according to plant type: 20–25 cm (Indicas), 40–45 cm (Sativas), or up to 60 cm for very tall varieties like Haze or Thai.
2. Top your plants:
After 4–5 nodes, cut above the top node to encourage multiple colas. Advanced growers often use 4-way LST here, topping each main cola twice to create four symmetrical “arms” ready for weaving.
3. Begin weaving (“tucking”):
Once tips grow 5 cm above the screen, gently guide them sideways into the next square. Always try to place each branch in its own hole to give it room to develop.
4. Work methodically:
Start tucking branches from the corners and edges, then move toward the centre. This ensures an even fill across the whole net.
5. Fill the screen:
Continue tucking during veg until about 70% of the screen is covered. This ensures there’s still room for stretch during early flowering.
6. Switch to flower:
Flip to 12/12 when coverage looks right. During the first 2–3 weeks, plants will stretch. Keep weaving to maintain a flat canopy.
7. Prune below the screen:
Remove shaded leaves and weak branches to redirect energy upward. This also improves airflow.
8. Finish in bloom:
Once stretch is over, allow colas to rise vertically. These evenly spaced buds will now fatten and mature together.
👉 A common mistake is starting too early. If you tuck while plants are still small, they’ll quickly outgrow the screen, forcing you to redo the setup. Patience pays off here.
Easy ScrOG Without a Net
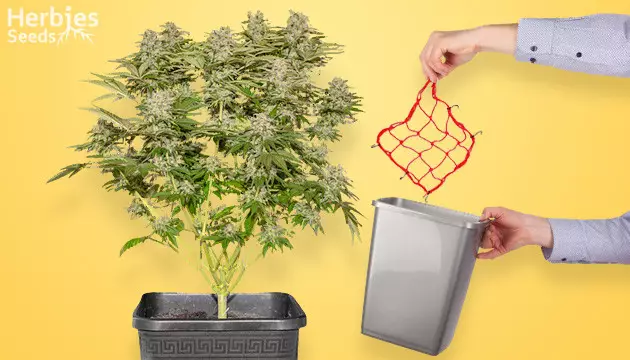
Not everyone wants to commit to a trellis system. Fortunately, there’s a simpler version of ScrOG that uses ties instead of netting.
With this method, you still spread branches horizontally but secure them to the rim of the pot or nearby stakes. It’s easier to water and access plants, especially in small tents.
Steps for Easy ScrOG:
- Top your plants after the 5th node.
- Bend tall branches outward and tie them to the pot rim.
- Re-adjust every 1–2 weeks during veg to keep the canopy flat.
- Switch to flowering when the plant has spread wide enough.
This approach doesn’t maximise yield quite as much as a full net, but it gives many of the same benefits with less hassle.
How to Scrog Autoflowers
Scrogging autoflowers is possible, but it requires precision. Since autos switch to flower automatically, veg time is short, leaving little room for recovery.
Best practices for autoflowers in ScrOG:
- Start training early, ideally in the second week of veg.
- Avoid heavy topping – autos don’t have time to bounce back.
- Stick to gentle LST and weaving instead of aggressive pruning.
- Aim for 60–70% screen coverage by week 3–4, before flowering begins.
Autoflowers can benefit from this method, but photoperiod strains are far more reliable for ScrOG, since you can extend veg as long as necessary.
Screen of Green Outdoor Grow
While most ScrOG setups are indoors, the method also works outdoors. By building a frame around your plant and stretching netting across it, you can manage tall Sativas and prevent them from growing uncontrollably.
Outdoor ScrOG is especially useful for stealth grows, since it keeps plants low and manageable while still delivering heavy yields.
Combining ScrOG with Other Training Techniques
ScrOG alone is powerful, but when combined with other methods it becomes exceptional.
- LST (Low Stress Training): Bend and tie branches for extra spread with minimal recovery time.
- Lollipopping: Remove lower bud sites to boost airflow and direct energy to the top colas.
- Main-lining: Sequential topping to create a symmetrical plant with up to 32 main shoots – perfect for weaving into a screen.
- Super cropping: Gently squeeze and bend stems to make them more pliable, improving light penetration and canopy shape.
These techniques enhance ScrOG’s natural strengths, giving you even more control and yield potential.
Best Strains for Scrogging Cannabis
The best strains for ScrOG share a few traits: medium height, flexible branches, and photoperiod genetics. While Indicas and hybrids scrog well, tall Sativas are especially rewarding when controlled under a screen.
Great choices include:
- Blueberry Hill from Herbies Seeds: Indica-dominant, compact, with THC up to 26%.
- Bruce Banner #3 from Original Sensible Seeds: A high-yielding hybrid with up to 28% THC and massive indoor output.
- Marmalate Early Version from Delicious Seeds: Fast flowering (45 days), resilient, and easy to train.
- Super Lemon Haze from GHS: A stretchy Sativa that becomes manageable under a ScrOG net.
- White Widow from Dutch Passion: A classic hybrid known for its adaptability and training potential.
👉 Autoflowers can be scrogged too, but for the best results, stick with photoperiod strains that allow extended veg time.
Tips for Successful ScrOG Grow
ScrOG is about consistency. Once the structure is in place, small details make all the difference.
- Maintain airflow under and above the canopy with fans.
- Prune regularly to prevent wasted energy on shaded growth.
- Water plants after training sessions to ease stress.
- Be gentle with weaving – never force branches.
- Space plants wisely: 4 medium plants per m², or a single large plant in a 25 L pot. A general rule of thumb is ~30 × 30 cm per plant.
- Use fabric pots to improve root aeration and overall plant health.
By staying attentive throughout veg and early flower, you’ll be rewarded with a uniform canopy of dense, resin-coated colas.
FAQ
What is the ScrOG method in cannabis growing?
ScrOG (Screen of Green) is a plant training method where cannabis branches are spread horizontally under a screen to create an even canopy, resulting in better light distribution, airflow, and increased yields.
When to ScrOG cannabis?
Start ScrOG during the late vegetative stage, ideally after topping. Begin weaving when branches are 5 cm above the screen to allow for a flat, even canopy before flowering.
Can you ScrOG autoflowers?
Yes, but it requires careful timing and light training since autoflowers have a short vegetative phase. Avoid topping and focus on gentle LST and weaving.
Do I need a net to ScrOG?
No. You can mimic ScrOG using ties or plant supports instead of a net. This allows for easier maintenance while still creating a horizontal canopy.
Herbies Head Shop expressly refuses to support the use, production, or supply of illegal substances. For more details read our Legal Disclaimer.






Thank you for leaving a comment for us!
Your feedback will be posted shortly after our moderator checks it.
Please note that we don’t publish reviews that: