How to Clone Cannabis Plants Step-by-Step: A Beginner’s Guide to Successful Cannabis Clones

Weed plant cloning may appear intimidating, but once mastered, it’s a very effective and cost-free growing method. Taking a clone, or 'cutting,' from a robust mother plant creates an exact genetic copy, often called a 'daughter' plant. This form of vegetative reproduction enables each clone to develop its root system without altering the genetics, traits, or growth habits of the mother plant. Cloning ensures consistent plant quality and can lead to perpetual harvests of your preferred strains.
So, how can you learn the art of cloning cannabis plants? Let’s break it down and explore how cloning works, why it’s beneficial, and how to do it successfully.
Why Consider Clones?
Before exploring the how-to, let's cover the why. Cloning is a reliable growing technique that allows growers to duplicate successful cannabis genetics accurately. If a given plant has produced outstanding results – whether in potency, scent, or robustness – you can count on its clone to do the same. Unlike seeds, which can fluctuate in phenotype or even yield male plants, clones provide consistency and remove genetic uncertainty.
Another great advantage is the availability of a steady supply of female plants, ideal for ensuring an ongoing harvest cycle. As long as you have a healthy mother plant, you can always yield new clones. Best of all, cloning is extremely cost-effective. Using just some basic equipment, you can cultivate numerous new plants without purchasing seeds. Multiple cuttings can be harvested from one plant, making it an effective and efficient practice for any gardener.
What You’ll Need to Start Cloning
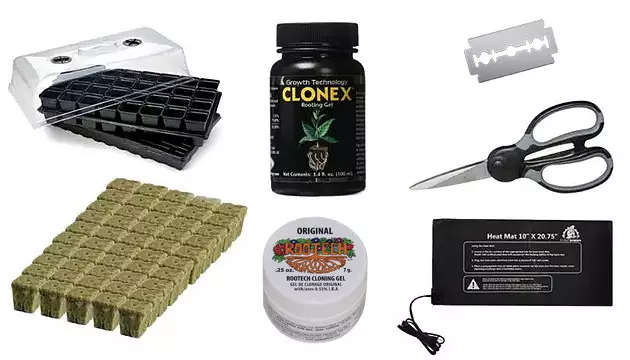
Cloning cannabis is simpler than it sounds, and you won't need much equipment to get started. However, a few additional tools and products – like rooting gels – can make you more successful, so it's worth being prepared.
- Mother plant: Needs to be in the vegetative phase. Knowing when to clone cannabis is key – while you can take clones from plants in the flowering stage, you can keep mother plants in a vegetative state seemingly forever, so as long as the plant is healthy with appropriately-sized stems for cutting, its exact age is not an issue.
- Sharp blade or scissors: A sterilized razor, scalpel, or trimming scissors will do.
- Light source: Low-intensity LED grow lights work best for clones.
- Rooting medium: Options include rockwool cubes, starter plugs, soil, or even plain water.
- Cloning gel or powder: Helps stimulate root growth. Products like Clonex are packed with vitamins and hormones.
- Humidity dome or warm, humid environment: Helps maintain ideal conditions while clones root.
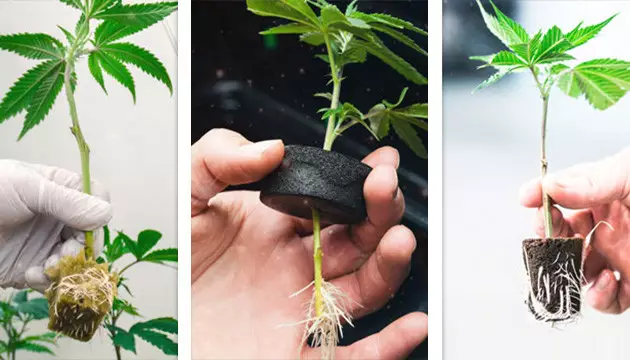
Choose Your Rooting Medium
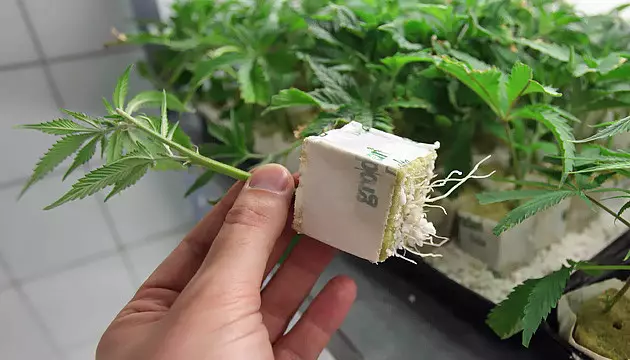
This is where the rooting medium comes into play. With so many medium varieties from which to select, one general requirement is airflow. Since clones need oxygen to breathe, rockwool cubes are growers' favorites due to their excellent air and water circulation. In fact, if you’re learning how to clone cannabis using rockwool cubes, you’ll find them especially convenient – they’re clean, easy to handle, and ideal for transplanting into hydroponic, soil, or coco grows. Other ‘non-soil’ options include starter rockwool cubes or the use of a hydroponic cloner/propagator machine.
Alternatively, if you’re curious about how to clone cannabis plants in soil, the process involves placing your cutting directly into a light, well-aerated soil mix. Just make sure the medium isn’t rich in nutrients or overly wet. While this traditional method is simple and accessible, keep in mind that you won’t be able to observe root development beneath the surface.
Lastly, there’s an easy water method – the answer to how to clone cannabis plants in water without cloning gel. Once your clone is prepared, all you have to do is place it in water. You can watch as your roots develop and re-pot when the moment arrives.
Ideal Conditions for Cloning
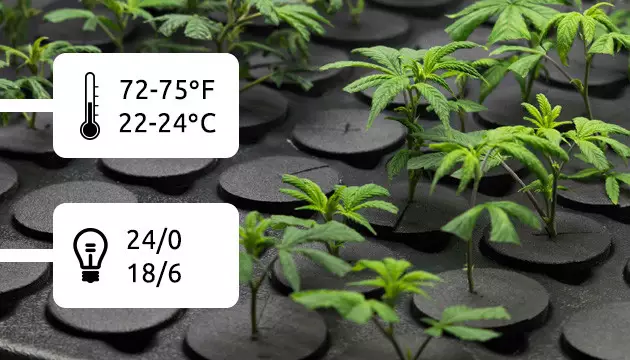
Like other cannabis growth phases, successful cloning relies on precise environmental control. Temperature, humidity, and light levels all matter.
Humidity: 70-80% is ideal. Use a dome or frequent misting to maintain this.
Temperature: Aim for 72-75°F (22-24°C).
Lighting: Use low-intensity, steady light – LEDs in the 250W range are suitable. Keep clones under light for 18-24 hours a day. Avoid strong HID lighting that can dry out delicate cuttings; instead, opt for a softer type of light like CFLs or LEDs rated for seedlings/clones.
How to Clone Cannabis Plants – The Step-by-Step Guide
Step 1. Prepare your medium
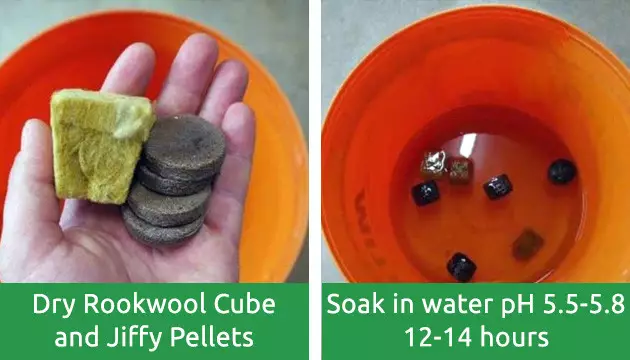
You’ll have to work quickly when taking clones, so you’ll want to prepare your medium and supplies before getting to work. That includes preparing your medium with proper pH conditions. If you’re using rockwool or pellets, fill a bucket with water with a pH level of 5.5-5.8. Place the medium in the water and let it soak for up to 24 hours.
Step 2. Select your clones

First, you’ll have to choose what cuttings you’ll take from the mother plant. Tops that are actively growing are preferred, as these contain more growth hormones than the lower parts of the plant. You’ll want to choose a mature cut that has no more than 2-3 nodes. The cut should have 2-3 fan leaves and a sturdy stem of about ⅛ of an inch in thickness.
Step 3. Take your cuttings
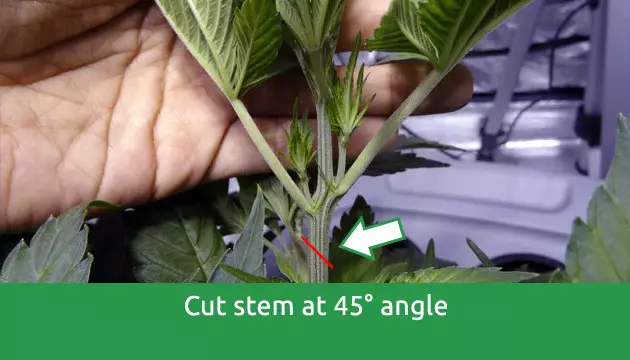
Once you’ve chosen the stems you’ll be taking, it’s time to cut. Be sure to sterilize the razor or blade you’re using to avoid any flower infections. If you’re wondering where to cut to make a cannabis clone, go for the lowest node on the stem and make the incision at a 45° angle, not too close to the main branch. Taking the cut through the node is ideal since hormones reside in high concentrations there. This will allow for quicker root growth for the clone overall. Cutting at an angle also increases clone success due to having a higher surface area that will help water absorption. If you’re taking multiple cuts, quickly place the cuttings in water, where they can stay until you place them into your medium. If left exposed to the air, issues like air embolisms can arise.
Step 4. Apply rooting gel and place in the chosen medium
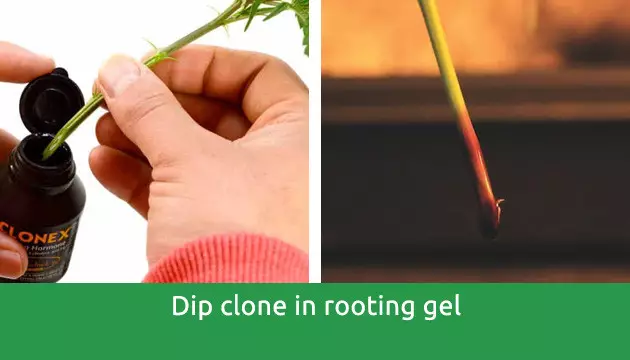
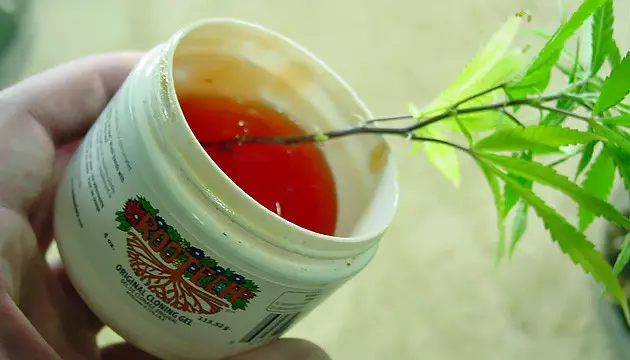
Before placing the clones into your medium, you’ll first trim the top fan leaves in half with sterilized scissors. This decreases transpiration, so the new roots don’t have to support as much plant material. You can also remove smaller fan leaves or node points at the bottom of the stem if these are present. Reducing leaf presence to a minimum will help support root growth. If your medium doesn’t have pre-cut holes, make one prior to putting the stem inside. Once the fan leaves are trimmed and a hole is made in your medium, dip the end of the stem into your rooting gel, powder, or both. Then, carefully place the stem inside the hole in the medium.
Step 5. Insert into the medium
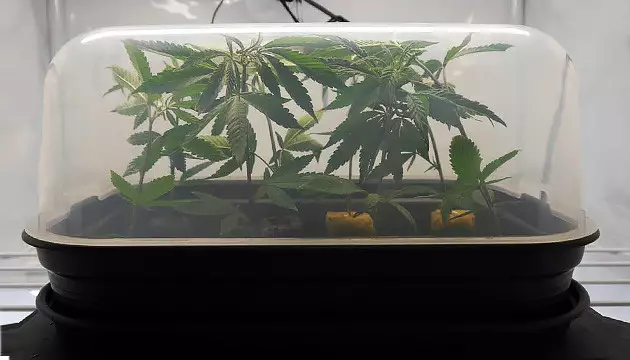
Prior to placing your clones in the dome, mist around the top for humidity. You can also mist the clones lightly after putting them in the dome. This allows the cuttings to absorb water through the leaves.
Step 6. Maintain the environment
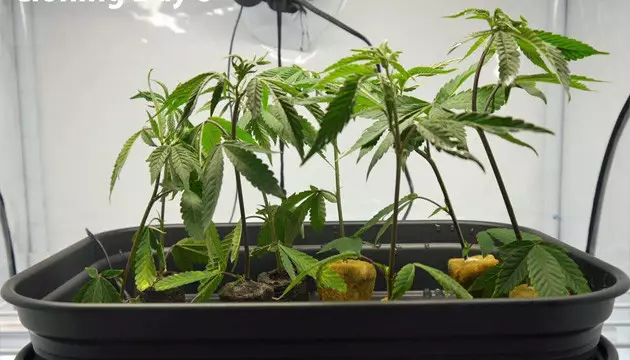
Place your dome or tray under low light and over a heating mat if you’d like. Leave the clones in the dome for 3 days, lifting the dome once per day to allow new air in. Try to avoid checking for roots until after the 3 days, as the cuttings are delicate. You’ll want them to establish healthy growth without disturbance for a stronger plant overall. After a few days, you’ll need to re-water your cubes or medium with properly pH-ed water. Do let them dry out slightly, however, as this will cause the roots to grow more vigorously due to them searching for water to absorb. Roots should exit the medium within 7-10 days. This is when to remove the clones from their humidity domes and prepare them for transplanting.
Transplanting Your Clones
Your cutting should show roots within 7-10 days, and they’ll be ready for transplanting into their initial growing pot or container within 1-3 weeks. You’ll know your clones are ready to be transplanted when you can remove the humidity dome for up to 2 hours without the plants wilting.
Transplanting clones is another process you’ll want to do quickly to avoid the roots becoming exposed to too much air. First, fill your container with the soil of your choice and create a small hole or dip in the soil to place your rooted clone in. At this point, some growers choose to support root growth with an antifungal like Mycorrhizae. You can sprinkle the nutrient or powder of your choice into the soil where the new clone will be placed.
Once you place the clone into your container, lightly pack the soil around the stem. Then, lightly water the plant immediately. From there, your transplanted clones can be placed in weak blue spectrum vegetative stage lighting and be fed nutrients, mostly nitrogen, also lightly. After 10-20 days, your clone will have a healthy, developed root system and be ready for transplanting again if or when necessary.
Further Tips for Cloning Marijuana Plants
Clones are sensitive and need proper care. Here are a few bonus tips for better results:
- Always keep your tools and environment sterile.
- Use a heat mat if room temperatures drop below the recommended range.
- Avoid overwatering – roots need oxygen just as much as moisture.
- Label clones if you're taking from multiple strains.
- Be patient. Avoid disturbing the clones for at least 3 days.
Ready to Start Cloning?
Now that you know how to clone a weed plant properly, the possibilities for your garden are endless. Once you master the steps it takes to care for delicate clones, you’ll wonder why you didn’t start doing it earlier. Cloning weed allows for uninterrupted crops and harvesting of proven genetics you’ve had success with previously. Use these tips and attentive monitoring to continue cloning successfully for your garden’s perpetual gain.
Herbies Head Shop expressly refuses to support the use, production, or supply of illegal substances. For more details read our Legal Disclaimer.


Thank you for leaving a comment for us!
Your feedback will be posted shortly after our moderator checks it.
Please note that we don’t publish reviews that: