Building Your Own DIY Grow Tent: How And Why You Should Do It
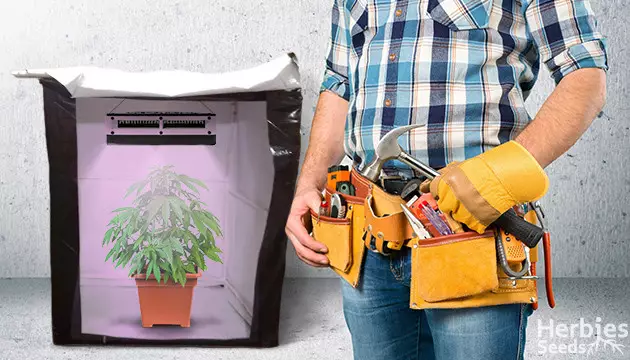
If you’re an indoor cultivator, chances are you’re somewhat familiar with grow tents. These structures can be an indoor grower’s best friend when used correctly. However, they can also be expensive. In this post, part of our Indoor Season series, we’ll explore some of the ways to save money by building your own DIY grow tent that will be just as effective.
Let’s Start With What You Need To Know About Grow Tents For Cannabis
Grow tents offer tons of advantages for an indoor grower. They’re invaluable tools for growers and are a simple way to exert control over several variables. However, there are some critical factors you’ll need to consider when learning how to build your own grow tent.
Key Benefits Of Growing Weed In Grow Tents
First, we’ll cover the benefits that grow tents offer. Regardless of whether you buy a tent or build your own, they’ll help you control all crucial environmental factors like temperature and humidity. If you can maintain a consistent environment in your tent, your plants will thrive.
Tents are also a great way to manage the light in your garden. During hours when your grow lamps are running, tents keep light inside your garden. In contrast, during dark hours, a weed growing tent can prevent harmful light leaks. Marijuana plants can be temperamental. If they sense any light during darkness, they may get stressed out and become hermaphrodites or re-veg.
Requirements For A DIY Grow Tent
Before you can build your own grow tent, there are some factors you’ll need to consider. First of all, the size of your area is critical. You’ll also need to make sure your tent has ample light, is fairly airtight, and has proper temperature, humidity, and ventilation.
Size
There’s no set size that a homemade grow tent needs to be. The size of your tent will usually depend on several variables, including how much space you have to work with and your plant count. One of the most common sizes among home cultivators is 3 square feet (1 square meter). Height is also super important when building a tent – you’ll need at least 2 meters (6 feet) of vertical space for a successful indoor grow.
Light
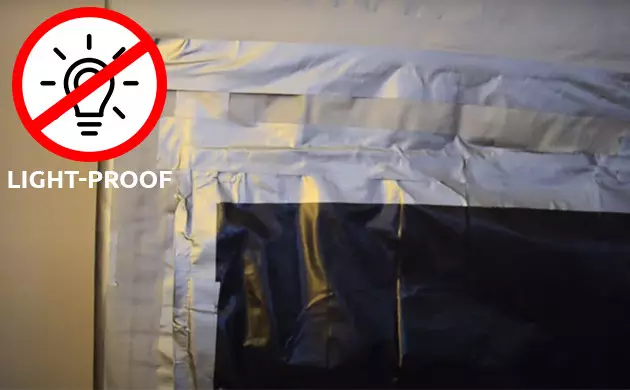
Light is also an important factor to consider when building your own grow tent. Keeping good light in and bad light out is arguably a tent’s main job. As a result, your tent must be completely light-proof. Many growers will tell you that light leaks only matter with photoperiodic plants, not autoflower strains. However, that’s not exactly the case. Autoflower strains still need periods of darkness for proper photosynthesis and respiration.
Airflow
Airflow is just as important a consideration as light when you’re building a grow tent. Proper airflow helps prevent infections, aids in strengthening plant stalks, and more. If you don’t have the correct airflow within your tent, you won’t have a uniform temperature throughout your garden. Instead, you’ll develop hot and cold spots. Additionally, poor airflow will allow humidity to spike in certain parts of your tent. This often happens toward the exterior walls of the tent and may even result in condensation. That’s a recipe for disaster – harmful fungi, bugs, and bacteria all love humidity.
Ventilation
Ventilation is an often-overlooked part of building a killer DIY grow tent. Along with airflow, ventilation will help you manage the environment inside your garden. You can build your own ventilation relatively cheaply. Just be sure to include a carbon filter in your ventilation system to help minimize the smell your garden generates. You don’t want any nosy neighbors prying about and asking why your house smells like dank buds.
Temperature
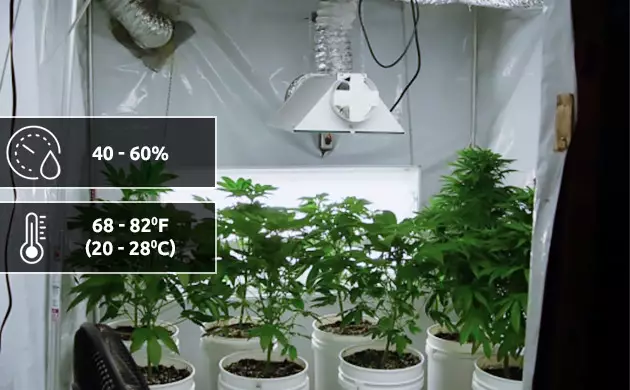
No matter where you’re growing, you need to maintain proper temperature. This is particularly true in a homemade grow tent. Tents tend to trap heat, which is generated by your grow lamps along with other sources. Weed plants love a warm environment – between 68 and 82 degrees Fahrenheit (20 and 28 degrees Celsius). However, a tent can quickly overheat. Therefore, you may need to consider buying an air conditioner for your tent. Conversely, if you build your tent in an area that’s usually fairly cold, you may need to install a heater.
Humidity
Like temperature, humidity is a critical environmental factor for any grow. Controlling humidity is one of the best ways to avoid potential problems from arising in your DIY grow tent. We touched on humidity while explaining airflow earlier in this post. Humidity is the number-one variable that contributes to pathogen infections in a cannabis garden. You can prevent infections by keeping the relative humidity in your tent between 40 and 60 percent, using airflow to help manage humidity. However, for extreme cases, you may need to invest in a dehumidifier.
Making A DIY Grow Tent Step By Step
Here, we’ve compiled a guide on how to build a grow tent step by step. First, we’ll go over the necessary materials, tools, and other requirements. Then, we’ll dive straight into the process of how to build a tent, including installing ventilation and the best possible lights.
Required Materials And Tools
PVC Pipe – This is the best material to use as the bones of your homemade grow tent. While contractors usually reserve PVC for plumbing applications, it makes for a great structure. It’s also inexpensive and is extremely sturdy for how light it is. 19-millimeter PVC pipes generally work best for tent-building.
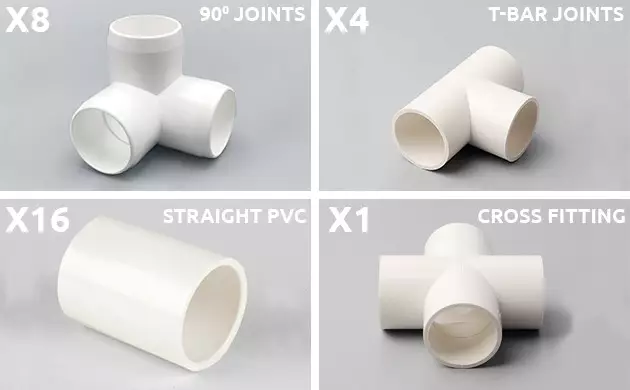
You’ll need a few different PVC fixtures to build your structure. They include:
- 8 x 90-degree joints – the kind with three inputs
- 4 x T-bar joints
- 16 x straight PVC
- 1 cross fitting
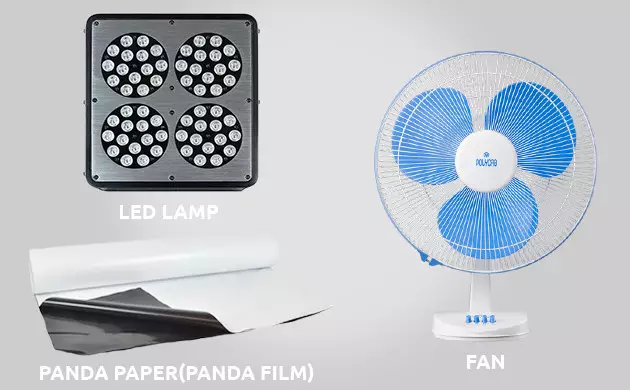
Panda Paper – Also called “Panda Film” in some circles, this stuff is the perfect DIY grow tent material. They’re white on one side and black on the other, so they eliminate incoming light while reflecting the spectrum within your tent. Make sure you use the white side for the interior of your tent and the black side for the exterior. You can make an entryway in one of your walls by using a strip of Velcro or an adhesive zipper.
Grow light – LEDs work best, as they give off less heat without sacrificing power.
Fans – You won’t be able to attach wall-mounted fans to a DIY grow tent made of Panda Paper, so instead, use fans that come with a stand. Rotating fans help promote airflow. Additionally, buy a carbon filter to help exhaust fresh air from your garden.
You’ll also need a hand saw to cut the lengths of PVC and duct tape to plug light leaks.
Step 1: Build The PVC Frame Of Your DIY Grow Tent
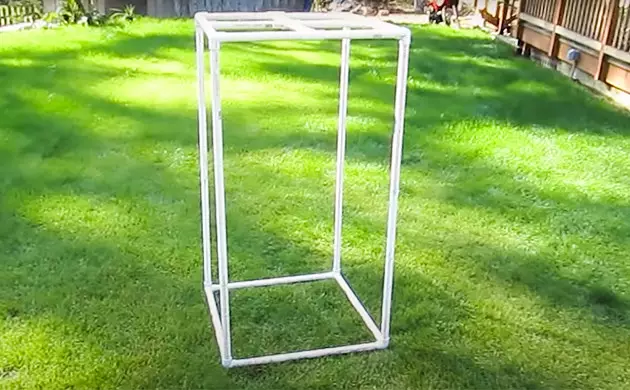
The first thing you’ll need to do is assemble the structure of your homemade grow tent. First, cut down the lengths of pipe to fit the size of the area you’re using. You’ll need 4 lengths to build your base, 4 to build the vertical struts, and 8 for the ceiling. Once you’ve cut your PVC to the right size, assemble the frame. Use the cross-fitting fixture on the roof. This will ensure that your tent is solid – you don’t want it collapsing in the middle of your grow cycle!
Step 2: Cover The Frame
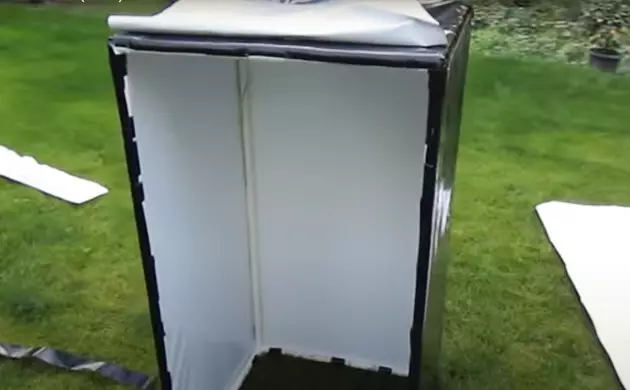
Next, cover the frame of your homemade grow tent with Panda Paper. Cut sheets to fit into each side of your tent individually. Attach them to the frame with duct tape. If you accidentally tear a sheet of Panda Paper, don’t fret – you can use duct tape to plug any light leaks.
Next, choose one side of the tent for your door. Cut a straight line down the middle and install Velcro or a zipper.
Step 3: Install Ventilation
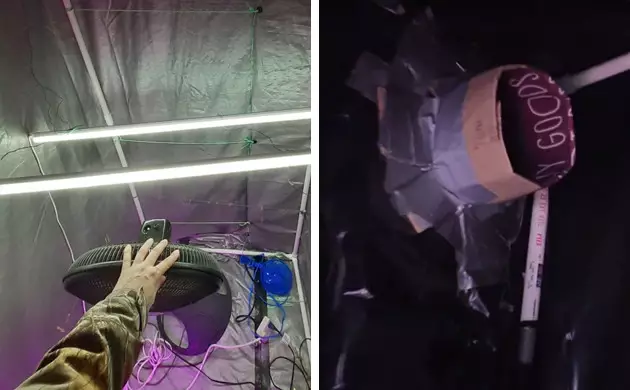
This can be one of the toughest parts of building your own weed growing tent. First, put your rotating fan in a corner of the tent. Set it to oscillate for maximum airflow. Next, place the carbon filter on the floor diagonally across from the fan.
Attach ducting to the carbon filter. Cut a hole in the Panda Paper for the ducting and lead it out of the tent. Plug any holes with duct tape to prevent light leaks. If you have a fireplace, you can run your ducting into it. Fireplaces are great, because you can exhaust your weed-scented air above your house where no one will smell it. Otherwise, choose a window and attach the ducting there.
Step 4: Install LED Lights
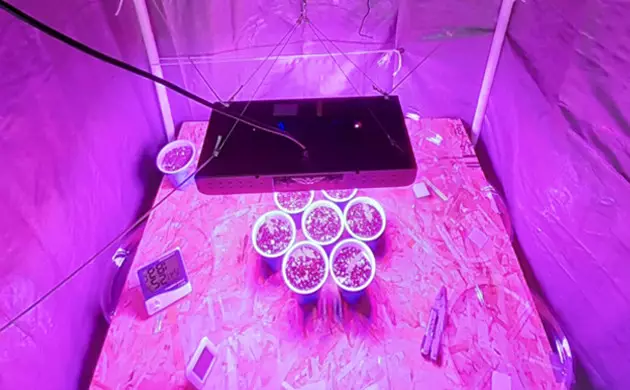
LED lights are the best choice for an indoor DIY grow tent since they don’t generate much heat. Attach your LED lamps to the crossbeams running across the top of your tent. The crossbeams will distribute the weight and keep your tent from collapsing.
DIY Grow Tents Are Terrific
Now that you know how to set up a grow tent, you’re ready to get building! Using this guide, you’ll be able to create a grow tent that will last multiple harvests. Building a tent will save you significant money over buying a pre-made one, and you can design it to fit your own specific needs.
Herbies Head Shop expressly refuses to support the use, production, or supply of illegal substances. For more details read our Legal Disclaimer.




Thank you for leaving a comment for us!
Your feedback will be posted shortly after our moderator checks it.
Please note that we don’t publish reviews that: