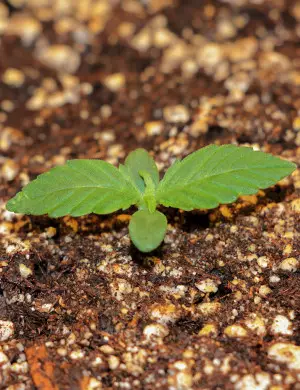
My Experience Growing Original Purple Haze Auto By Original Sensible Seeds
Last updated: 21 August 2020
Purple Haze is one of the most famous strains in the history of weed. Made popular by the 1967 Jimi Hendrix song of the same name, Purple Haze is a household name. Today, it lends its name to countless cannabis products such as joint papers. It’s also one of the first strains I ever smoked, so once I found some Original Sensible Seeds Purple Haze at Herbies, I jumped at the opportunity to grow it.
My research has shown that Purple Haze is a heady Sativa that provides a powerful euphoric high. This cross between Purple Thai and a Haze plant has an uncertain history – no one is exactly sure who first bred it. What is certain is Purple Haze’s strength and durability. While many genetics weaken with age, Purple Haze has maintained its resilience to pests and pathogens. As a result, it’s an easy strain to grow for the majority of cannabis gardeners – sounds perfect to me!
Below is an in-depth analysis of my experience growing Purple Haze. I’ll start off with what gear I used and follow up with a week-by-week description of how the plant grew.
Equipment For Growing Original Purple Haze
Since I live in a fairly urban area, I set up a garden inside my house. I built a 4 x 4ft (0.37 x 0.37m) tent from panda paper and PVC pipe to create an enclosed garden. Tents can help a grower control temperature and humidity to make a perfect growing environment. While buying a premade tent kit from a company can run a grower hundreds of dollars, building a tent yourself costs less than $50 and only take a few hours of setup time.
Since I was only growing a single plant, I decided to use soil to help streamline the process. Soil is an extremely forgiving medium. Growing in soil can help eliminate pH or nutrient problems before they ever arise. Since I was trying out a new strain that I’d never cultivated before, I decided it was a good idea to take advantage of the flexibility and ease of growth that soil provides.
Using soil also meant that I didn’t need to worry about making a nutrient mix. Instead, I could just feed my plants water and let the nutrients in the soil do the work. Since I was only growing a single plant, I used a 5-gallon (about 19-liter) pot to ensure my roots had plenty of room to grow.
Growing Original Purple Haze – Progress Week After Week
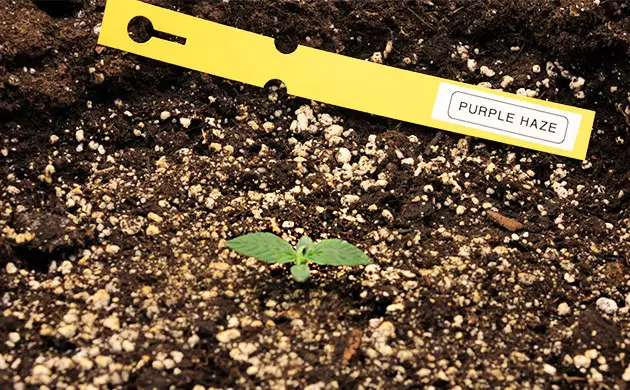
I was amazed at how quickly Original Purple Haze reached maturity. It only took 10 weeks to raise my plant from a seedling to harvest. I kept the plant in the veg cycle for 4 weeks before flipping my lights and switching the plant into its flower cycle.
Because this particular strain of Purple Haze is autoflowering, I set my light to be on for 20 hours per day. That gave my plants plenty of light to photosynthesize into energy. It also protected them from fungi and other pathogens that grow in dark, wet places.
Variables like ambient temperature and humidity are crucial for the success of a garden. That’s especially true in the early phases of a plant’s life cycle. Vegging plants like hot and humid environments, similar to the conditions you’d find in the middle of summer.
4 Weeks Of The Original Purple Haze Vegetative Stage

I started by planting four Original Purple Haze seeds in rockwool cubes until I saw they had all rooted. Because these seeds weren’t feminized, I needed to keep a careful eye on them to identify any males. A single male plant can ruin a grow by pollinating any other females in their area. Once a female plant is pollinated, it won’t produce THC.
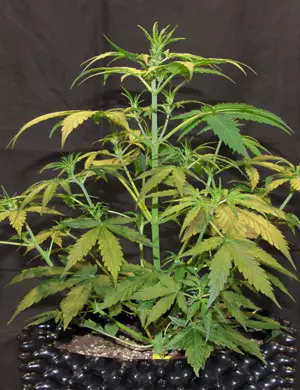
Keeping this in mind, I set my temperature to hover around 81 degrees Fahrenheit (27 degrees Celsius) and kept my garden’s humidity around 40-45%. In the first 4 weeks of flower, my plant shot up more than 17 inches (40cm) in height.
Original Purple Haze Flower Cycle: Week 4 To Harvest
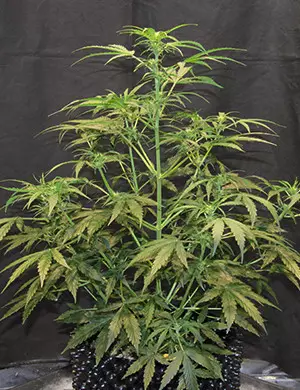
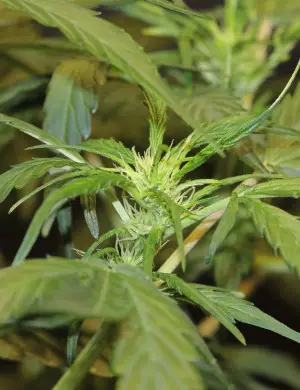
Since this Purple Haze strain is an autoflower variety, I didn’t even need to change my light timer before the plant began flowering. I noticed my plant beginning to stretch around week 4, and by week 5, buds were starting to appear. At the end of week 4, I defoliated my plants to ensure they were getting proper light penetration.
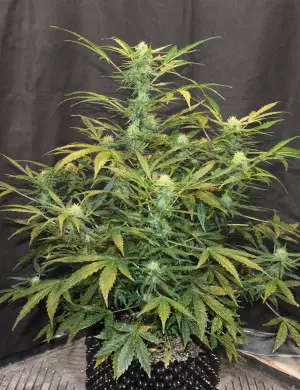
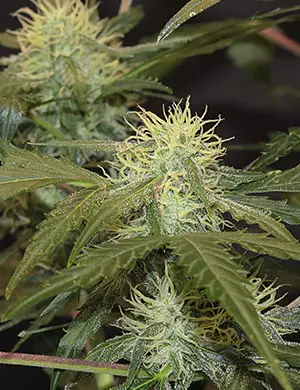
I also defoliated during weeks 7 and 9. Defoliating late in the flower cycle allows buds to fully develop and ripen. There’s a noticeable difference between plants that get defoliated in late flower and those that don’t. Plants that receiver proper defoliation have deep, forest green nugs, while those that don’t receive proper light are a lighter version of yellowish-green. The smell continued to develop throughout the flowering cycle, becoming impossible to ignore around week 8.
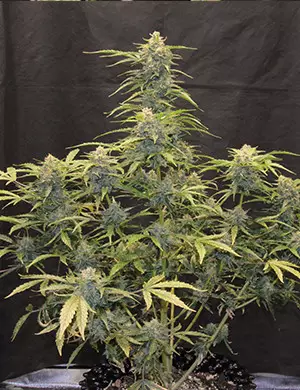
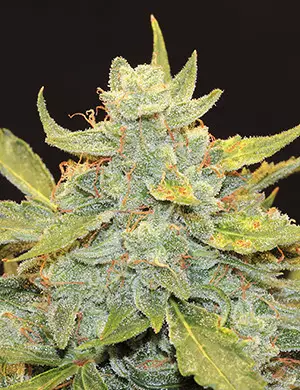
While I maintained the same amount of light per day, I dialed back the heat and humidity as the flowering cycle progressed. By week 8, I’d cut my temperature back to about 65 degrees Fahrenheit (18.3 degrees Celsius). I also cut my ambient humidity back to about 30% RH. By the time the plant’s trichomes had turned amber and it was ready to harvest, it stood nearly 30 inches (75cm) tall.
The Result Of Growing Original Purple Haze
My experiment growing Purple Haze ended up being a mixed bag. After 10 weeks, I found myself with 11 oz (311g) of wet flower. After I dried and cured my plants, I was left with about 3 oz (85g) total. This was a little disappointing.
However, what I did harvest was extremely high-quality weed. The nugs were dense, had a smooth taste, and were extremely potent. It was definitely an encouraging outcome, and I’m going to be growing this strain again. Hopefully, next time I can boost my yield.
Herbies Head Shop expressly refuses to support the use, production, or supply of illegal substances. For more details read our Legal Disclaimer.



Thank you for leaving a comment for us!
Your feedback will be posted shortly after our moderator checks it.
Please note that we don’t publish reviews that: