


ScrOG Growing Method

The ScrOG method, short for Screen of Green, is one of the most effective cannabis training techniques for indoor growers. By spreading branches across a horizontal screen, you can turn a plant into a wide, light-filled canopy. The result? More evenly developed buds, bigger harvests, and healthier plants that use your space and lighting much more efficiently. In this article, we’ll walk you through what ScrOG means, how to do it properly, when to start, and even how to get similar results without a net.
What Does ScrOG Mean?
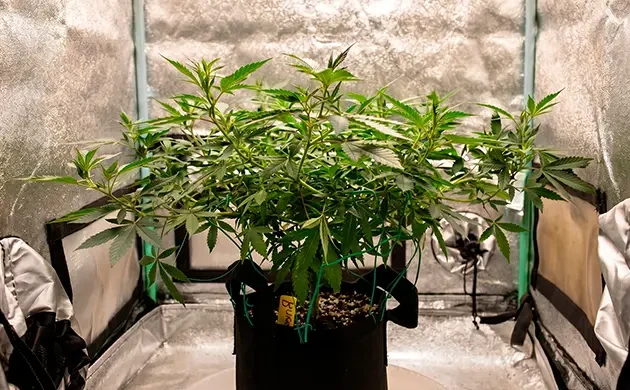
The term ScrOG stands for Screen of Green. Imagine stretching a net above your pots and weaving the branches through the squares. Instead of one tall cola surrounded by weaker side branches, every bud site gets its share of light. The plant grows outward rather than upward, creating a “green screen” that catches all available light.
This technique is particularly popular with indoor growers working in tents or grow boxes where vertical height is limited but there’s still horizontal room to spread out.
Why Use the ScrOG Cannabis Technique?

ScrOG isn’t just about making a plant look neat. It offers several key advantages. First, it creates a level canopy, which means your grow light can sit closer to the tops without creating hotspots or leaving shaded corners. Second, airflow improves dramatically, reducing the risk of mold. Third, the plant puts its energy into a larger number of productive tops rather than wasting it on lower, larfy buds.
It typically results in a 20-30% yield improvement over untamed plants. It also prevents vigorous Sativas from taking over your grow, making ScrOG simultaneously a yield-improver and a height-controller.
When to Start ScrOG
Timing also comes into consideration. If you start too early, the branches will be too short to weave well, and you’ll be reshaping them again afterwards. If you start too late, the stems become hardened and liable to break off as they are bent. The optimum timing is straight after topping, when the branches are long enough to guide but still soft.
Equipment For ScrOG

Here are all the things you’ll need to get started.
Screen
The screen can be made from nylon trellis, string, or elastic netting. The hole size should be around 5 × 5 cm (2 × 2 in). Chicken wire and fishing line are best avoided because they can damage the stems.
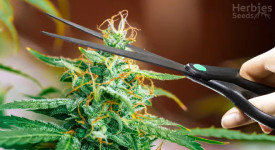
Scissors
These are essential for pruning underneath the canopy. For best results, make sure they’re sharp and sterile.
Large Pots
Your plants need to be transferred into their final pot (> 5 gallons) before the screen is used, as once it’s on, you can’t move your plants around. A single large container works if you want one massive plant, while several medium pots allow you to run multiple plants with one net. Both soil and hydroponic systems are compatible with this method.
How to Scrog Cannabis
Before you start, remember that ScrOG is all about creating an even canopy and maximizing light exposure. The key is preparation – from setting up your space correctly to training your plants at the right time. Once everything is in place, the rest is just patience and gentle hands.
Setting Up Your ScrOG

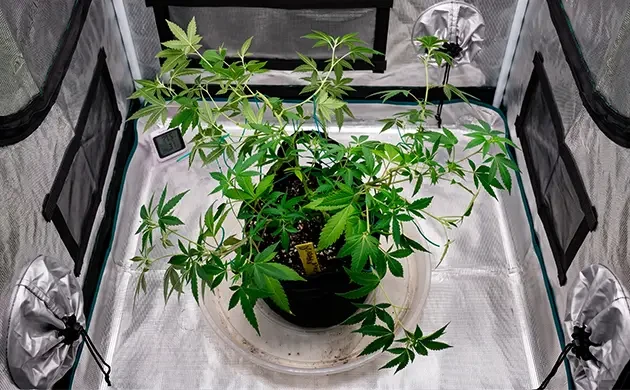
A successful ScrOG depends on the right setup. Most growers position the screen 20-25 cm (8-10 in) above the pot for Indica-dominant strains. With Sativas, which stretch more, the net is usually set higher – about 40-45 cm (15-17 in). Very tall plants may need 50-60 cm (20-24 in) to give you enough space to weave the branches.
Make sure your screen is securely fixed and evenly stretched across the grow area. It should be sturdy enough to support heavy branches later in flowering. Also, ensure there’s good airflow and light distribution around and under the canopy – this helps prevent mold and keeps growth uniform.
Scrogging Step by Step
Step 1: Start in the vegetative phase.
Begin by cutting the plant back at the 4th or 5th node to encourage side branches. This early topping helps your plant grow wide instead of tall.

Step 2: Guide branches through the screen.
When the branches reach the height of your net, carefully push them through the holes and guide them horizontally to spread growth evenly.
Step 3: Keep weaving as plants mature.
As the plant grows, continue to weave new shoots back under the screen until about 70-80% of the net is covered. This ensures the canopy is full and even before flowering.
Step 4: Switch to flowering.
When you reach 70-80% coverage, change your light cycle to 12/12 to trigger flowering. The next two to three weeks, known as the stretch, are crucial – keep weaving daily during this period, as branches will grow fast.

Step 5: Let the canopy rise.
After the stretch ends, allow the tops to grow above the screen and form a flat, uniform layer of colas.
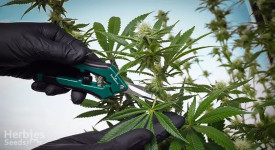
Step 6: Clean up below the net.
Finally, prune away the lower growth that never reaches the canopy. This helps your plant focus its energy on the top sites that receive the most light.
Easy ScrOG Without a Net

Not every grower wants to fix a net across the tent, especially if it makes watering or moving plants difficult. Fortunately, it’s also feasible to replicate ScrOG without a net. Instead of threading branches through a lattice, push them outwards gently with soft garden ties and secure them to the rim of the pot or support stakes.
This no-net technique is also easier to work with, as you're still able to move your pots around, and it’s very well-suited to autoflowers or growers who don't want to implement more formal training. The canopy won't be so evenly spread as it would be under a full ScrOG, but your light penetration as well as airflow will still be much enhanced over just leaving the plant unmanipulated.
Below, we’ll outline how to put together a simple ScrOG setup without using a trellis.
Step 1: Top Plants in Veg
Just like you would with normal ScrOGging, the easy ScrOG method begins with topping. Top your plants after they develop their fifth node. This creates two new kolas that grow wide and bushy instead of a single kola that spends all of its energy growing vertically.

Continue to top any branch that grows past your canopy. Only top in the veg phase, though. If you top in the flower phase, your plants won’t develop two new tops. Instead, you’ll just be hacking off the top of your kola – no one wants that!
Step 2: Bend Stems to Create Even Canopy
The next step in our easy ScrOG method, bend tall branches downwards to lower your total canopy height and spread branches out wider. Tie the branches to the lip of your pot using a green twist tie.

This technique is similar to the low stress training method. However, while LST attempts to tie branches down during the early veg phase, this modified ScrOGging technique requires you to do so later in the veg phase. Wait until you’re at least two weeks into veg to begin.
Once you’re done with this step, all of your plants should be spread outwards. The tops of your branches should extend beyond the rim of your pot.
Step 3: Re-Flatten Plants Every 1-2 Weeks
Continue training weed plants in your garden by repeating the previous step every 7-14 days. Only do this while you’re in the veg phase, though. Once your plants move into the flower phase, their stems will become less bendy and malleable. Once that happens, you won’t be able to safely bend them without running the risk of breaking a stem.
Step 4: Flip into Flower
Once you have a nice, wide, even canopy, you can flip into the 12/12 flower phase whenever you want. Generally, you can flip into flower after you finish your second or third round of this easy ScrOG method.

After your plants spend a week or so in the flower phase, you’ll notice an explosion of vegetative growth. This is called “stretching,” and is normal within the first week or two of the flower phase. If you complete this easy ScrOG technique correctly, your branches will turn upwards and grow towards your light.

At this point, you’re ready to sit back and wait until harvest day. Watch as your plants grow outwards instead of upwards and utilize the full space of your garden. With this technique, it’s easy to fill an entire tent with a single plant.
Which Strains Are Good for scrogging?
Most strains will respond well to this technique, Sativas and Indicas alike. This also means it can complement hybrid genetics well. The key characteristics needed for a good ScrOG strain is a short flowering period, steady growth, a small to medium final height, and strong yet flexible branches.
However, we suggest using photoperiod strains for Screen of Green. While autoflowers can still be grown with this technique, they have a set vegetative growth period, which makes it more difficult to make ScrOGging possible. On the other hand, photoperiod strains can be kept in the vegetative stage for as long as needed to fill the net and form a good, broad canopy.

ScrOG and Autoflowers
Although ScrOG is most often used with photoperiod plants, it can work with autos too if you’re careful. The main difference is that autoflowers don’t have the luxury of extended veg time, so you must act quickly. Start low-stress training as early as the second week and avoid heavy topping, which can slow them down. Aim to spread the branches across the net before the plant automatically flips into bloom. A lightly filled net is usually enough to make a difference in yield and bud quality.
Maintenance and Best Practices
A properly functioning ScrOG needs constant care. Monitor airflow both above and below the canopy, employing oscillating fans to avoid air stagnation. When securing branches, do so carefully to prevent the stems from snapping once they begin to hull during flower. Watering following the training exercises serves to minimize stress.
Most growers also defoliate, stripping some fan leaves off the primary layer to open up the lower bud sites. It's all about moderation, as extensive stripping all at once will stress the plant. As time goes on, your touch will become keener as to exactly how much pruning your strain is capable of.
FAQ – Quick Answers
What does ScrOG mean?
It stands for Screen of Green, a cannabis training method where branches are woven under a net to form an even canopy.
How do you scrog cannabis?
Top the plant in veg, guide the branches through a net until the canopy is full, prune below the screen, and let the tops grow into the flowering stage.

When to start ScrOG?
After topping, when the branches are long enough to reach the net but still flexible.
How high should ScrOG be?
Around 20-25 cm for Indicas, 40-45 cm for Sativas, and up to 60 cm for very tall plants.
How do you scrog autoflowers?
Use gentle low-stress training early on, avoid topping, and aim to spread branches before the automatic flowering begins.
Final Thoughts
The ScrOG method remains one of the most powerful training techniques for indoor cannabis. Whether you run a single plant under a net, train several with one screen, or even use a tie-down “no-net” approach, ScrOG consistently improves yields and bud quality while keeping your grow compact and efficient. Once you’ve mastered the timing and weaving process, you’ll wonder how you ever grew without it.
Herbies Head Shop expressly refuses to support the use, production, or supply of illegal substances. For more details read our Legal Disclaimer.
- Shared on Twitter
![icon]()
- Shared on Facebook
![icon]()


Thank you for leaving a comment for us!
Your feedback will be posted shortly after our moderator checks it.
Please note that we don’t publish reviews that: