


Northern Lights 10 of 10 Grow Diary and Strain Review

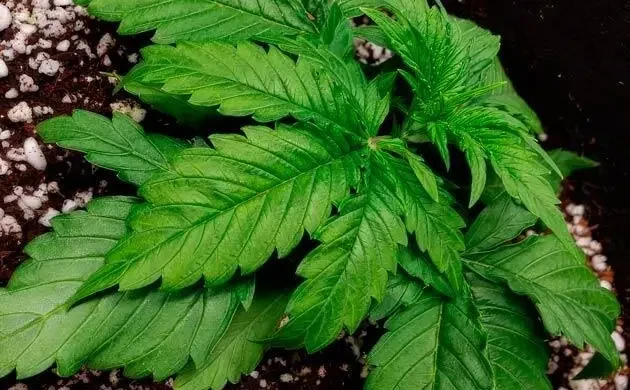
This was my first real grow, so Northern Lights 10 of 10 from Seedkeepers became more than just another strain test. I had no plant-growing background at all, only a basic setup and a lot of hope that an Indica-leaning, short, fast-flowering variety would forgive some beginner mistakes.
The room was built around a small grow box with ventilation, a filter, a light, a timer and a fan. For the medium, I used coco mixed with perlite, and the nutrient line was Terra Aquatica. I started with 3 seeds and quickly learned that even plants from the same pack can behave very differently.
Key Characteristics
- Seed Type: Feminized
- Flowering Type: Photoperiod
- Suitable for Growing: Outdoor, Indoor
- THC: 30 - 35%
- CBD: 1%
- Flowering Time: 50 - 55 days
- Height: 1.5m (59.1 inches)
- Genetics: Northern Lights x Secret Hybrid
- Effects: Relaxing
- Flavors: Citrus, Earthy
 - Cannabis Strain Seeds for Sale")

- Photoperiod
- Dreamlike calm
- 500 - 600 g/m² indoors
700 - 800 g/plant outdoors
Starting the Run
Week 1
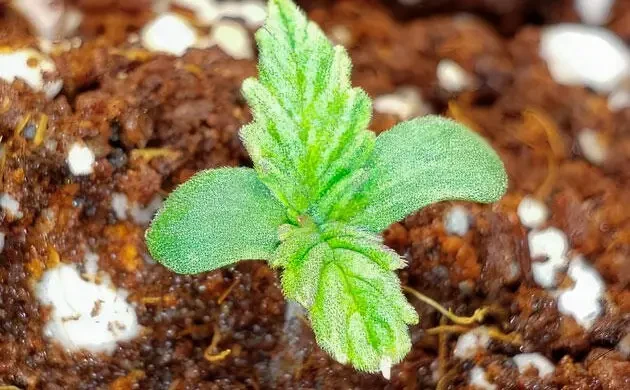
I started by germinating the seeds while preparing the coco. The brick was soaked, buffered the way growers on the forum recommended, then mixed with perlite at roughly 70:30 and packed into the pots. By the time the containers were ready, all 3 seeds had cracked.
The seedlings went into shallow holes and were covered lightly with the same medium. Since the coco was already wet, I didn’t water from the top right away. I only kept the planting spots from drying out. On July 12 and 13, all 3 sprouts came up with a clean first set of leaves. On July 16, I gave the first light feed with 0.1ml/l CalMag, 0.1ml/l Micro and 0.2ml/l Bloom.
Week 2
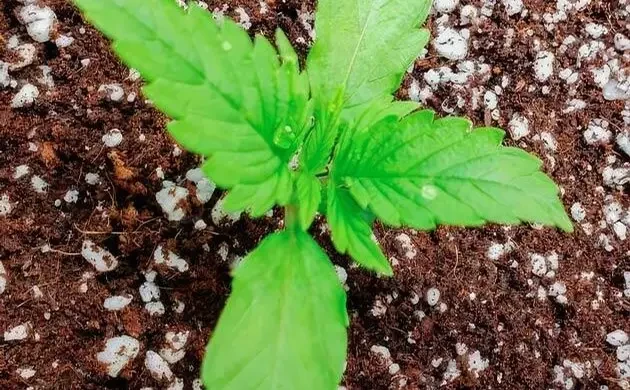
The second week looked promising. The seedlings had a bright green color, growth was steady, and they seemed to take the food well. At this point, the mix was 0.2ml/l CalMag and 0.8ml/l Grow, with a plan to raise it during days 14-21.
The box conditions were close to ideal for such a young start: 22°C (71.6°F) in the daytime, 20°C (68°F) at night, and 65-70% humidity. The light was hanging 45cm (17.7in) above the plants. At pot level it even felt a little cool on my hand, so I wasn’t worried about burning them.
Veg Progress and Training
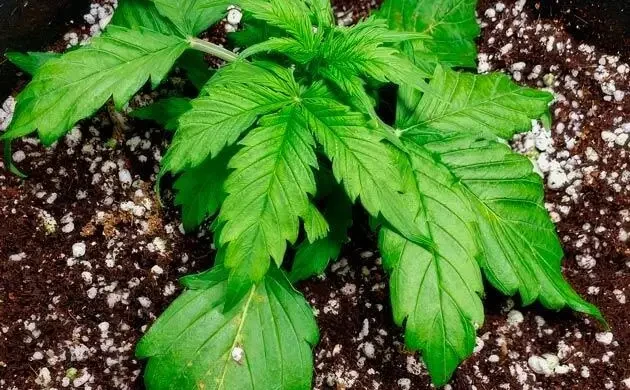
Week 3
This is where the easy part ended. Each plant had its own problem. One clearly didn’t like my early LST attempt, and the shape came out awkward, so I removed the ties after about a day and decided to let her recover.
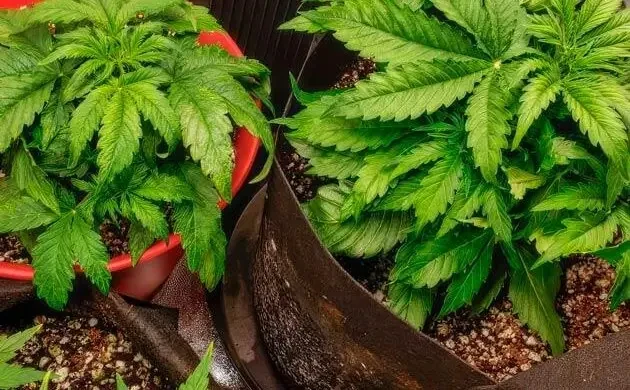
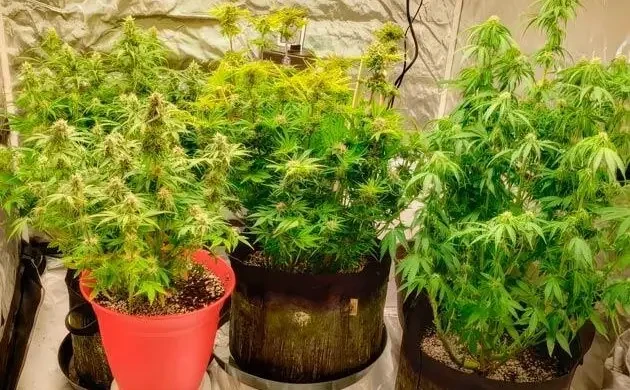
The second plant, sitting in a 12l (3.2gal) plastic bucket, looked strange from the beginning. The leaves were rough, yellowish in places, and just not healthy-looking. The third one was the calmest of the group. A few odd marks had shown up earlier, but they faded, and compared with the others she looked fine.
Feeding was raised to 0.8ml/l CalMag, 1ml/l Micro and 2ml/l Bloom. I still wanted to return to LST, but only once the plants looked strong enough to handle it.
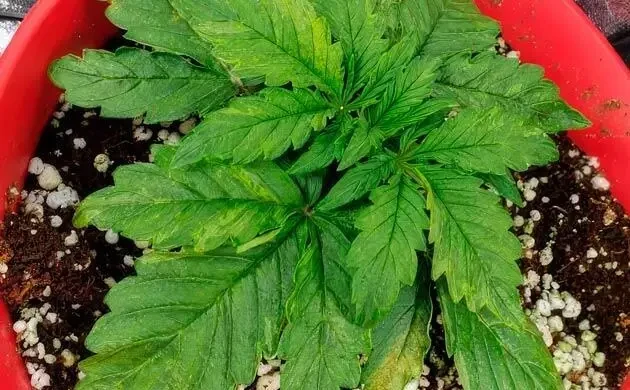
Week 4
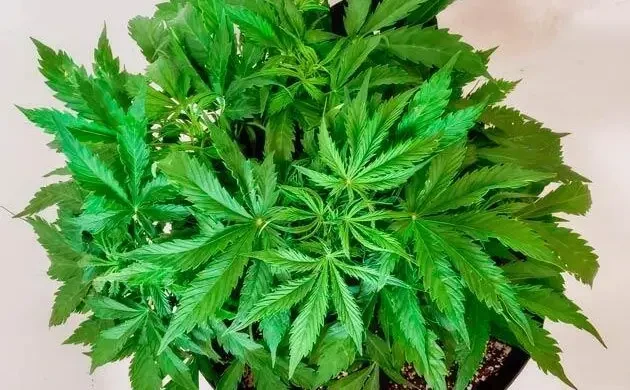
Despite the rough start, the plants put on good size this week. They stayed compact, but the bushes became denser and much leafier. I wasn’t sure whether the short structure came from the light distance or intensity, so I kept watching instead of making dramatic changes.
This time I handled LST much more carefully. The plants were stronger, and the training went smoother for both them and me. The feed was 1ml/l CalMag, 1ml/l Micro and 2ml/l Bloom, and that scheme seemed stable enough to keep.
Week 5
Week 5 was the most educational part of veg. One plant showed what looked like too much calcium: rusty leaves and a generally tired look. I flushed her well, left her alone for 24 hours, then softened the feed to 0.3ml/l CalMag, 1ml/l Micro and 1.5ml/l Bloom.
The contrast between the 3 plants became obvious. One stayed small, one looked strong and steady, and one had already taught me a lesson about pushing nutrients too hard. The healthiest plant was actually the one I touched the least: just a little LST, some light defoliation, and that was it. Around the middle of the week, I switched the lights to a 12-hour day and waited to see how the trio would respond.
The Flip and Early Flower

Week 6
Two out of 3 plants moved into flower earlier than I expected. The first was the smallest one, only 25cm (9.8in) tall in the plastic bucket. The next was the plant in the 19l (5gal) grow bag, around 40cm (15.7in) tall. The third still hadn’t fully shown herself, but it looked like only a matter of days.
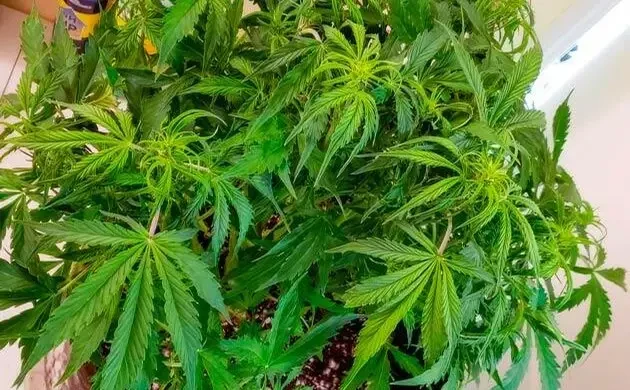
The nicest part was that none of them showed fresh stress after the previous corrections. For the 2 flowering plants, I changed the feed to 0.2ml/l CalMag and 1.8ml/l Bloom. The last plant stayed on a transitional mix with 0.2ml/l CalMag, 1ml/l Micro and 1.5ml/l Bloom. At the end of the week, I gave all 3 a fairly serious defoliation to open up the future bud sites.
Week 7
This week was quiet, which was exactly what I needed. The flowers grew a little, the leaves looked even, and there were no new signs of deficiency or stress. After the earlier mess, that felt like progress.
Two problems became impossible to ignore, though. Humidity was sitting around 70%, which felt risky for flower, and the plants were running out of space. The branches had spread enough that I couldn’t open them properly for better light penetration. I ordered a larger box and a dehumidifier, learning the old lesson that cheaping out once can cost more later.
Week 8
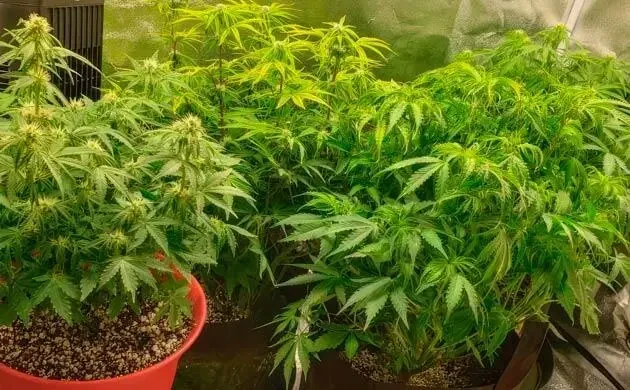
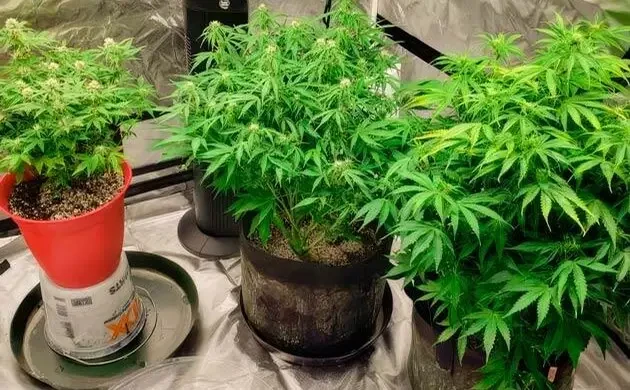
Moving the plants into the new box changed the mood of the grow right away. They finally had room, and all 3 looked better than they ever had in the old space. The color was deeper, the posture was livelier, and the humidity dropped to about 45% without even turning on the dehumidifier.
The smallest plant had some yellowing on the lower leaves, but I took it as normal flowering behavior and didn’t panic. The largest plant was stranger. It had shown pistils after the light switch, then seemed to pause instead of building proper flowers. I kept feeding it closer to veg with Bloom mixed in only about every third feeding, hoping the extra time would eventually turn into more yield.
Late Flower and Finish
Week 9
By week 9, the girls were growing and flowering without much drama. The smell had become noticeable, though I couldn’t pick out a special note. To me, it was just that classic cannabis smell, simple and familiar.
Week 10
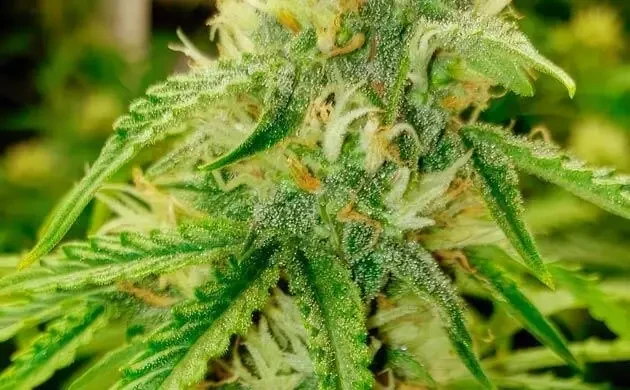
There wasn’t much news this week. I kept feeding the plants, and even the tallest one finally moved onto the common flower routine. I checked the trichomes with a jeweler’s loupe, and most of them were still clear with only a small amount turning cloudy.
That told me not to rush. The plants were still ripening at their own pace, and the best thing I could do was avoid forcing the finish just because the breeder’s flowering time looked close on paper.
Week 11
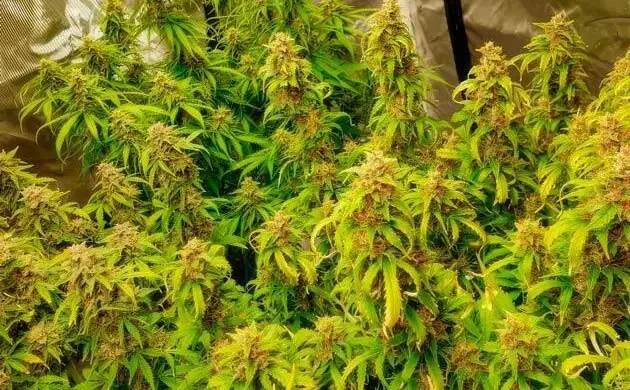
I started the week with moderate defoliation. The goal was to remove leaves that blocked light or made airflow worse, not to strip the plants hard. I also introduced a PK booster because the flowering stage was already moving properly and the buds needed support for density.
The reaction was good. I didn’t see any bad signals after adding the booster, so I kept the plan steady.
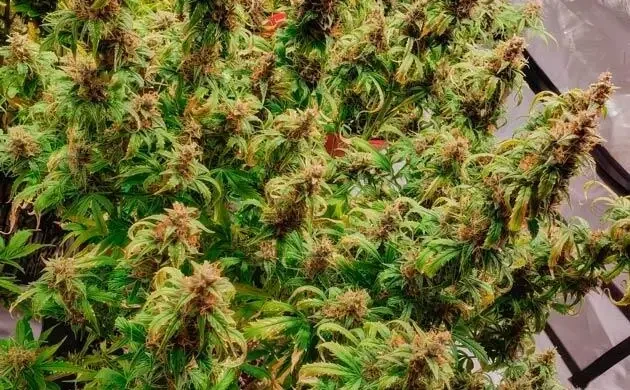
Week 12
The buds kept getting thicker, but the middle-sized plant began to worry me again. Its leaves curled downward, and the whole plant looked sick. The signs pointed toward overfeeding or salt buildup, so I flushed it well and waited before bringing nutrients back at a lower dose.
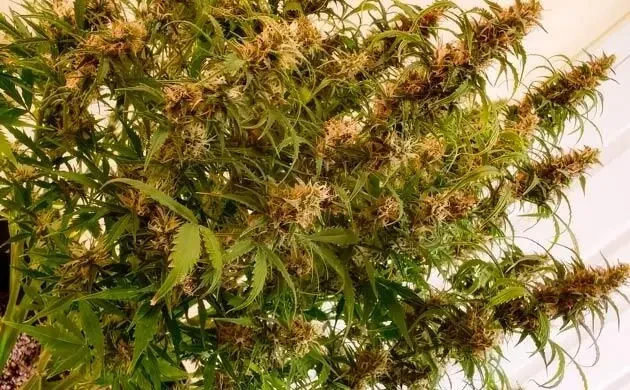
The trichomes still said the same thing: mostly clear, some cloudy, and no amber. The plants needed more time, even if I was already thinking about the finish.
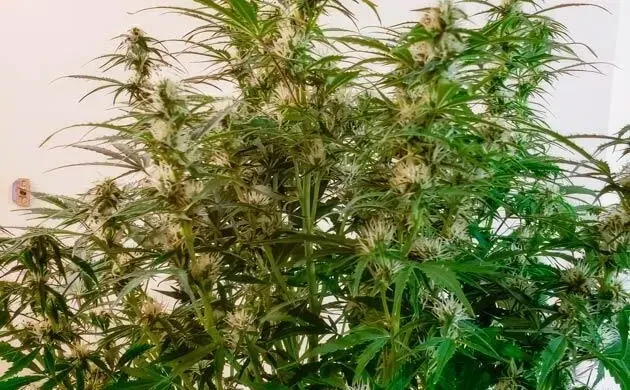
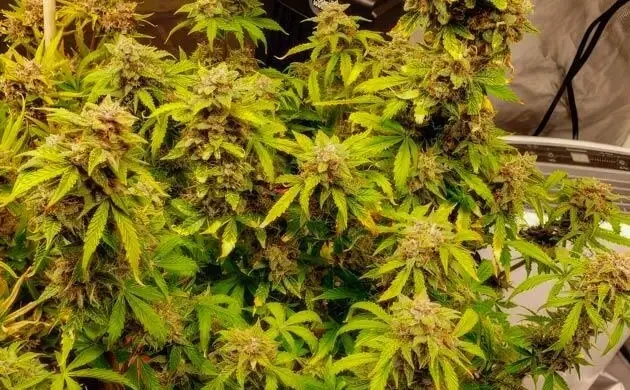
Week 13
The smallest plant was still the most mature one. She had flowered first, stayed stable, and kept adding weight. Her buds felt heavier, but I still couldn’t find amber trichomes, so I kept leaning on the bloom booster and waited.
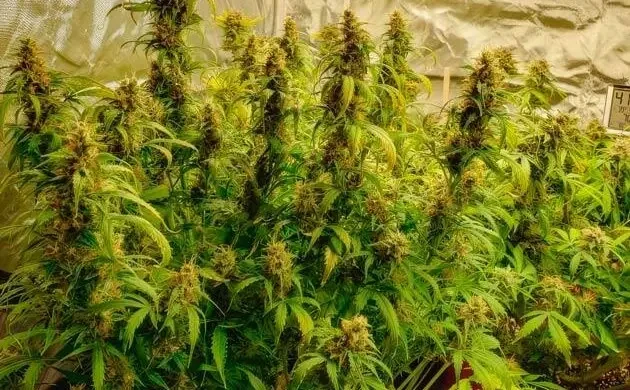
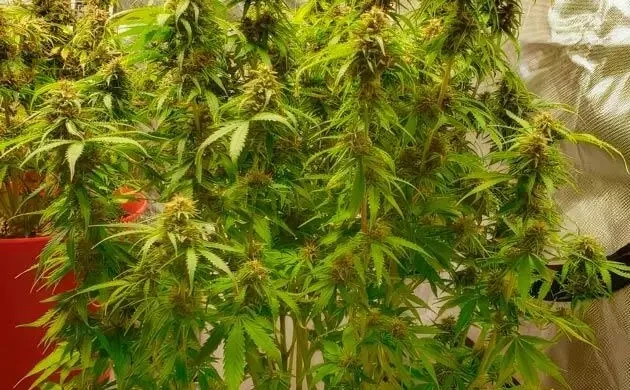
The second plant was the difficult one. The buds had gained size, but the leaves looked rough enough to make me doubt every decision. The tallest plant, on the other hand, looked the most confident in the room. It was later than the others, but healthier and easier to read.
Week 14
Not much changed in a clean, dramatic way. The problem plant still looked bad, and increasing watering to twice a day didn’t visibly fix anything. I tried adding a small amount of nitrogen again just to see whether it would help, but the strange part was that the buds kept swelling while the leaves looked like the plant was barely hanging on.
At this point, the run had become less about chasing perfect-looking plants and more about getting all 3 to the end. The smallest one was closest, the middle plant was still fighting, and the tallest looked like it could finish later but stronger.
Northern Lights 10 of 10 Yield and Final Thoughts
The final dry yield from all 3 plants was 107g (3.8oz). That’s not a record, but for a first cycle with several mistakes, I’m more than fine with it. The buds came out dense, aromatic and resinous, and there’s a different kind of satisfaction when the jar is filled with something you managed to grow yourself.
This grow taught me more than I expected. I had moments of frustration, especially with the plant that looked like it might give up for half of flowering, but even she made it to harvest and gave a respectable result. Northern Lights 10 of 10 didn’t make me look like an expert, but it did forgive enough for me to finish the run.
The biggest lesson was patience. Watch first, correct carefully, and don’t panic every time a leaf looks wrong. Next time I’ll start with a better-planned space and a calmer head, but this first run already gave me the experience I needed.
Herbies Head Shop expressly refuses to support the use, production, or supply of illegal substances. For more details, read our Legal Disclaimer.
- Shared on Twitter
![icon]()
- Shared on Facebook
![icon]()


Thank you for leaving a comment for us!
Your feedback will be posted shortly after our moderator checks it.
Please note that we don’t publish reviews that: