


Grow Report: Gelato Auto by Original Sensible Seeds
Last updated: 12 September 2020

Hey guys. I recently grew a Gelato Autoflower plant from Original Sensible Seeds and wanted to share my experience. Usually, I don’t try out new strains. However, after I pulled down my last harvest, I wanted to try some new ones for a change. I’d heard great things about Gelato – some former coworkers from my time as a professional grower couldn’t get enough of it. So, I decided to give it a try.

Gelato is a distant relative of one of the most popular strains of the last decade: Girl Scout Cookies. Specifically, Gelato traces its lineage back to Thin Mint Girl Scout Cookies and Sunset Sherbet. It has a tasty fruity flavor that I normally don’t get since I primarily grow Kush strains. I also don’t usually grow autoflowering strains, so this was a new experience for me.
Garden Setup For Gelato Auto
I usually grow between four and six plants in a spare room of my house. However, for this experiment with Gelato, I only grew a single plant. As a result, I decided to use a 4 x 4ft (0.37 x 0.37m) tent. Tents are a great way to control the environment in your garden and keep out any external light. A tent also helps to keep the light from your grow lamps inside your tent, where it can be fully utilized by your plants.
I used a single 150-watt LED for this grow cycle. Usually, I assign each plant its own light so that my garden has between four and six lights running at any given time. LED lights are great for inexpensive, low-profile growing and to prevent raising any red flags with your utility company.
I germinated my seeds in rock wool before transplanting them into a 3-gallon (11.3-liter) pot with coco coir. Soilless options like coco coir give a grower complete control over the nutrients they’re feeding. I like having the ability to manage exactly what my plants are absorbing, so I always grow soilless. I fed my Gelato House & Garden nutrients, as I have with every strain since I started growing professionally.
I have a special nutrient mix I learned from a friend, and have outlined the exact mix in my breakdown of each individual week further below.
Growing Gelato Auto – Week by Week
Since I hadn’t spent much time growing autoflower strains before, I was surprised at how quickly Gelato Auto matured. After 5 weeks, it automatically switched from veg to flowering. Seven weeks later, it was ready to harvest.
Weeks 1-5: Veg

I started by planting five seeds in rock wool cubes. I like germinating multiple seeds to ensure that I get a robust, strong seedling. I was pleasantly surprised to find that all of the seeds I planted germinated. I raised all five plants through the veg cycle before culling the weaker ones in the early flower stage.

I kept my LED lights on for a consistent 18 hours per day. This is my usual approach for vegging plants, which need long hours of light to promote growth and keep them from entering the flowering stage too early. Vegging plants also love hot, humid environments. As a result, I kept my temperature around 82 degrees Fahrenheit (28 degrees Celsius) and my ambient humidity at 55% for the duration of my veg cycle.

My feeding schedule changed throughout the veg cycle. I began feeding at 5.9 pH and a total dissolved solid (TDS) of 250 PPM. This number may change depending on the composition of the water where you live. By the end of the veg cycle, I’d bumped my TDS up to 400 PPM. Feeding is a constant balancing act. While you don’t want to starve your plants, you also don’t want to overfeed them, as this can lead to several issues – most notably nutrient lockout.
During the veg cycle, my plants shot up about a foot (30cm). Before the last week of the veg cycle passed, I defoliated them to make sure they were getting enough light penetration through their canopies.
Flower Cycle: Week 6

This was my first time growing autoflowering plants, so I was surprised to see them switch into the flower cycle themselves. I kept my lights on for 18 hours per day to maximize the amount of photosynthesis my plants could perform. During week 6, I also performed some light LST to form a bushier canopy and ensure proper light penetration to flowers.
Once my strongest plant reached the flowering phase, it really began to stretch. In the first week of the flower cycle, my Gelato Auto grew 3 inches (7.62cm).
Nutrient mix:
- PH Perfect Sensi Coco A – 2 ml/l
- PH Perfect Sensi Coco B – 2 ml/l
Flower Cycle: Week 7

During this week, I defoliated the plant a little to let the light reach all the bud sites.
Its height increased by 2 inches (5.08cm).
Nutrient mix:
- PH Perfect Sensi Coco A – 2 ml/l
- PH Perfect Sensi Coco B – 2 ml/l
- Pro Cal – 1 ml/l
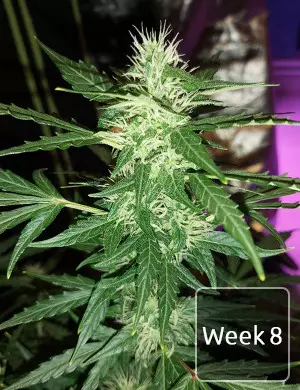
Flower Cycle: Week 8
Height Increase: 4 inches (10.6 cm)
Nutrient mix:
- PH Perfect Sensi Coco A – 2 ml/l
- PH Perfect Sensi Coco B – 2 ml/l
- Pro Cal – 1 ml/l
- Massive Bloom Formulation – 2 ml/l
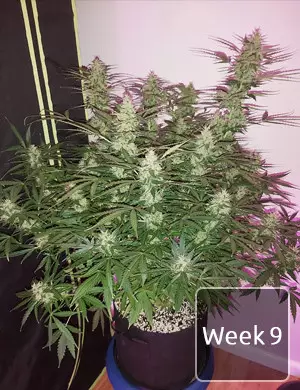
Flower Cycle: Week 9
Height Increase: None
Nutrient mix:
- PH Perfect Sensi Coco A – 2 ml/l
- PH Perfect Sensi Coco B – 2 ml/l
- Pro Cal – 1 ml/l
- Massive Bloom Formulation – 2 ml/l
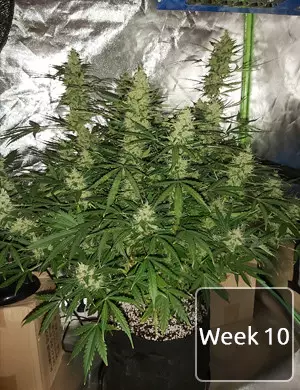
Flower Cycle: Week 10
Height Increase: None
Nutrient mix:
- PH Perfect Sensi Coco A – 2 ml/l
- PH Perfect Sensi Coco B – 2 ml/l
- Pro Cal – 1 ml/l
- Massive Bloom Formulation – 2 ml/l
- Supa Sticky – 2 ml/l
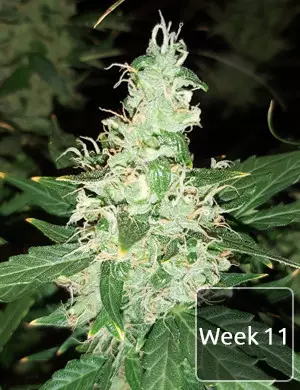
Flower Cycle: Week 11
Height Increase: None
Nutrient mix:
- PH Perfect Sensi Coco A – 2 ml/l
- PH Perfect Sensi Coco B – 2 ml/l
- Pro Cal – 1 ml/l
- Massive Bloom Formulation – 2 ml/l
- Supa Sticky – 2 ml/l
- Swell – 2 ml/l

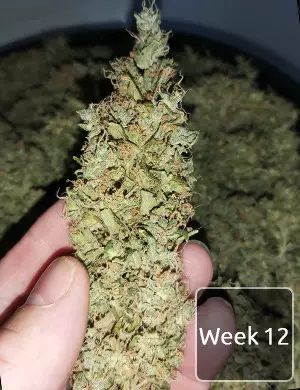
Flower Cycle: Week 12
Height Increase: None
Nutrient mix:
- Flawless Finish – 2 ml/l
The Outcome
After 12 weeks, my Gelato was ready to harvest. I cut it down and dried it for a few days in a dark closet. Then, I removed the buds and cured them in mason jars for about a month. Once they were dried and cured, I weighed them and was a little disappointed. At only 130g (4.6 oz), this strain fell short of the gram-per-watt yields that I usually go for, although I guess it’s a decent enough result for an auto.
However, there were also some positive results. The potency of this strain, combined with its complex flavor profile of lemon and spice, made the entire experience worthwhile. I also didn’t notice any serious pests like powdery mildew or aphids popping up, so it seems relatively resilient to problems. All in all, it was a fairly easy strain to grow.

Herbies Head Shop expressly refuses to support the use, production, or supply of illegal substances. For more details read our Legal Disclaimer.
- Shared on Twitter
![icon]()
- Shared on Facebook
![icon]()


Thank you for leaving a comment for us!
Your feedback will be posted shortly after our moderator checks it.
Please note that we don’t publish reviews that: