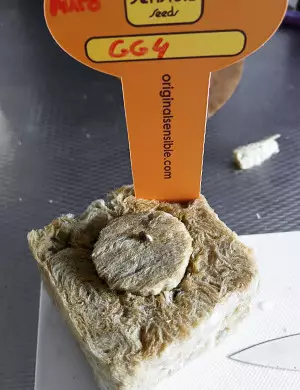
My Grow Report On Original Sensible Seeds’ GG#4 Original Glue Autoflower
Last updated: 23 August 2020
I’ve spent years growing weed, both at home and professionally. I thought I’d already grown every major strain within the last decade and beyond. I’ve grown everything from mainstream favorites like Girl Scout Cookies, Blue Dream and Skittles to old-school classics including Bubba Kush and Northern Lights. However, I realized that I still hadn’t dabbled with one of the most famous genetics of the 2010s: GG#4 Original Glue.
GG#4 Original Glue, also called GG4, is an Indica-dominant hybrid resulting from crossing Chem’s Sister and Sour Dubble. Since its emergence in the mid-2010s, it’s become a household name among numerous smokers. I decided to try my hand at growing this strain, popping four GG#4 Original Glue Autoflower beans from Original Sensible Seeds.
Equipment For Growing GG#4 Original Glue Auto
I kept everything relatively small-scale for this grow. I’ve turned entire rooms of my house into gardens before, but I wanted to keep tight control over every aspect of this grow, so this time, I only grew a single plant. I didn’t use a tent for this garden – instead, I just used a spare room in my house about 15 x 15 sq. ft (1.4 x 1.4 sq. m). I lined the room with panda paper to help block out any light leaks. Panda paper is also great for reflecting the light from your grow lamps.
As for the grow lamps themselves, I used a single 60-watt LED light. I hung this directly over my plant to ensure it received enough light. Since I only had a single 60-watt lamp, I decided a 3-gallon (11-liter) pot would give my plant enough room to grow.
I always struggle to decide which medium to use. I like soil because it’s easy, straightforward and forgiving. However, using a soilless medium makes it easy to control the variables in a nutrient mix. As a result, I settled on germinating my seeds in a rock wool cube and transplanting into coco coir once the seedling took root, which allowed me to dial in my mix’s total dissolved solids (TDS) and pH. I used Plagron nutrients since I had extensive experience using them before.
GG#4 Original Glue Auto – 3 Weeks Of Veg Phase
It only took 10 weeks for my GG#4 Original Glue Auto plant to fully mature from a germinated seedling into an adult. I’ve grown some autoflower strains that took significantly longer to reach maturity, so I was pleased with GG#4 Original Glue Auto’s quick growth. I’d definitely recommend it to any new grower who wants to flex their green thumbs.

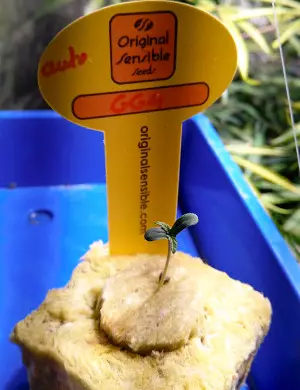
I began my grow cycle by successfully germinating five seeds. I kept my plants under a steady 18 hours of light every day, which helped super-charge their growth. My nutrient mix stayed at an even 6.0 pH throughout the veg cycle, and I fed the plant about a half-gallon (2.5-liter) of mix per day. I began with a 250-ppm mix and gradually worked my way up to 350 ppm by week 3. By then, my plant had grown to about 9 inches (23cm) tall.
I tried to maintain as much control as I could over ambient conditions like temperature and humidity. In the veg phase, plants like high temperatures, so I kept mine around 81 degrees Fahrenheit (27 degrees Celsius) during the daytime. At night, I let temperatures reach as low as 64 degrees Fahrenheit (18 degrees Celsius) I let my humidity hover around 40%, which is higher than I usually like but seemed to be perfect for these plants.
GG#4 Original Glue Auto – Early Flower
Once my plants reached the flowering stage, I kept a close eye on them to see if any were males. I got lucky, and every seed was a female. I chose the strongest-looking one about 3 weeks into the flowering cycle and got rid of the rest.
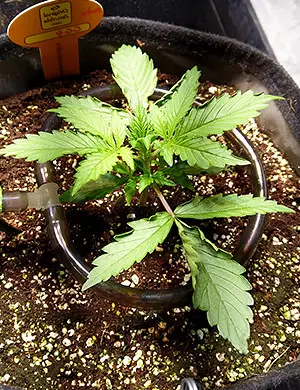
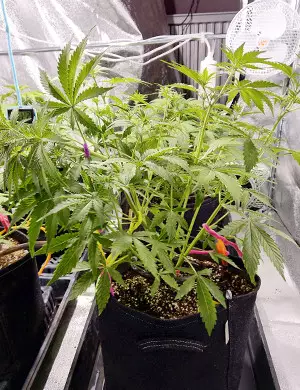
Since this GG#4 Original Glue Auto is an autoflower strain, I didn’t need to worry about switching my light timer. I kept it at 18 hours throughout the plant’s entire lifecycle. I also defoliated my plant in the first week of the flowering stage to ensure proper light penetration. In addition, I maintained the same ambient temperature and humidity as during the veg cycle, which the plants seemed to enjoy.
Over the first 4 weeks of flowering, I lowered the pH of my plant mixes from 6.0 to 5.8. I also increased the TDS of my nutrient mix from 400 to 600 PPM. The plant responded fairly well to these conditions, growing 27 inches (68cm) tall.
GG#4 Original Glue Auto – Late Flower
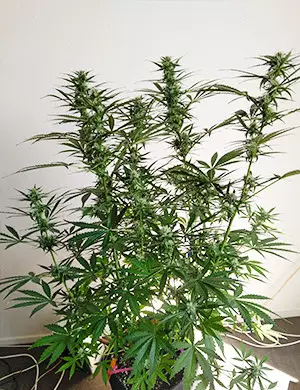
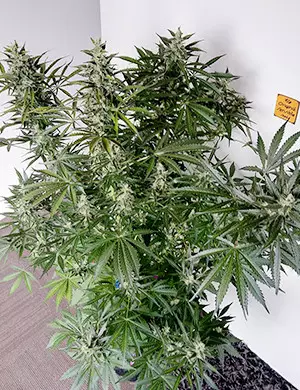
Once I reached week 5, my plant had essentially finished stretching and adding vegetative growth. At this point, it was bulking up the size of its flowers. I continued through late flowering with the same nutrient mix, air temperature, ambient humidity, and light that I’d introduced during week 4.
To help my plant finish strong, I defoliated again late in the flowering stage. This helps to “ripen” plants and reduce larf by ensuring every bud gets the light it needs. By the time the plant was fully mature and ready to harvest, it featured a loud, powerful smell that stunk up my entire house.
Post-Harvest Thoughts On GG#4 Original Glue Auto
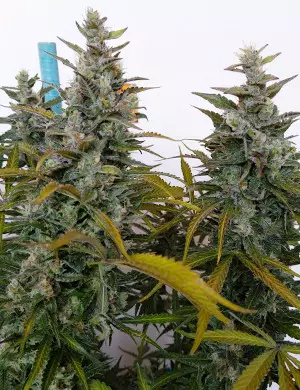
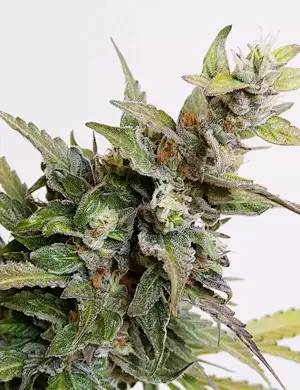
GG#4 Original Glue Auto was a breeze to grow and only took 10 weeks from seed to harvest. That makes it a particularly attractive choice for anyone who wants to speed through the grow cycle as quickly as possible. A single plant yielded 17 oz (490g) of wet weight, which reduced down to 2.7 oz (75g) when dried. I was thrilled when I managed to exceed 1g/watt. Considering the quality and weight of my harvest, it’s easy to see why GG#4 Original Glue is so famous today.
Herbies Head Shop expressly refuses to support the use, production, or supply of illegal substances. For more details read our Legal Disclaimer.




Thank you for leaving a comment for us!
Your feedback will be posted shortly after our moderator checks it.
Please note that we don’t publish reviews that: