




















For beginners













Ordering & Legal Basics
I want to buy cannabis seeds, but is it legal?
In general, if you want to buy cannabis seeds, you have to consider many legal factors, specifically if you can purchase, germinate and grow them. Some laws only allow you to purchase and/or own cannabis seeds, and prohibit germination and cultivation. Some laws prohibit sales and growing, but allow germinating of cannabis seeds. The legality of cannabis seeds depends on the location, and even varies within the same country. The best way to know if you are allowed to buy cannabis seeds is to check local laws.
How safe is it to order marijuana seeds online?
Yes, if you purchase from a reputable seed bank. Herbies Seeds has years of experience shipping seeds globally, and understands the needs of their clientele. Our packets are even more neutral than your average online purchase.
We know that beginners worry about customs, banking and privacy. Those concerns are reasonable, and we have built a reputation around solving those issues. For a more in depth explanation of the steps we take to address the issues you have read about, please see this article on the most common concerns and issues our clients have when ordering and how we deal with them.
Will anyone know what I purchased?
No. Your package will look like any other delivery. Your mail carrier will not be able to identify that it contains cannabis seeds.
Your package will contain an added layer of protection to ensure your seeds are not compromised during transportation. Your package will also not look any different than an online order you have received in the past.
Is shipping safe and discrete? How does it all work?
Ultimately, our goal is for your package to arrive safely and quickly to your destination. We ship to many destinations. Protection is the top priority for all shipments. We also ensure the neutral packaging we ship with does not attract unwanted attention.
Packages will travel smoothly, but just in case you have questions about customs inspections and other hypothetical situations, you can click here to learn about what we do to keep the delivery process safe.
What if my order gets lost? What if it doesn’t arrive?
If a package is lost or takes too long to be delivered, we will send you a new package or provide you with a refund. If you contact our support staff, we will look into the issue for you. Our top priority is making sure you get what you ordered. We have detailed the rare cases of delivery issues in the following link.
What sort of assistance can Herbies provide me after making my order?
Our support team is available round the clock. Need to track a package? Have questions about your order or payment? Reach out – we’re here to help. Plus, we’ve introduced an AI assistant that will help you choose the seeds that best suit your goals and growing setup in real time.
Our support doesn’t end after your purchase. If you have any questions about shipping or seed quality, you can reach out via live chat or email us at [email protected]. Be sure to check out our Contacts page as well – it includes a contact form and up-to-date contact information.
Where can I find all the information about Herbies' shipping options?
You can find all the information about shipping, including costs, terms, and delivery times, on our Shipping page. Terms are subject to change for valid reasons, so be sure to review them before making a purchase.
Seed Issues & Troubleshooting
What if my seeds don’t germinate? What should I do if my cannabis seeds won’t germinate?
The first thing to do if your seeds haven’t germinated is to check whether the necessary environmental conditions were met during germination.
To successfully germinate seeds, you need to keep the germination area dark, maintain a constant temperature of about 24-26°C / 75-79°F (even slight fluctuations can be fatal), and monitor the humidity. Excessive humidity can cause the seeds to rot. If the humidity is too low, the seeds will remain dormant.
The most reliable approach is to follow the proven germination techniques we recommend: using paper towels or cotton pads. You’ll find detailed instructions in our guide, How to Germinate Cannabis Seeds.
In case you’ve done everything correctly but your seeds haven’t germinated in the first few days, don’t panic. Sometimes seeds require a little more time, particularly in cases when the seeds are old or their shell is hard. Continue to maintain the necessary conditions. However, if the seeds still haven’t sprouted within 7 days, contact our support team – we’ll help you figure out what might have gone wrong and what you can do about it.
What should I do if I run into any problems while growing?
Problems can arise at any stage of the plant’s growth, but there’s no need to worry: most of them can be solved.
First, check the following:
- Watering. Overwatering is one of the most common mistakes made by novice growers. You can be sure that if the leaves start to wilt and growth slows down, this is the cause. The article “Watering Cannabis” will help you set up the right watering schedule.
- Nutrition. Yellowing leaves or scorched leaf tips can indicate either too many nutrients or not enough. Our articles “Nitrogen Deficiency” and “Nutrient Burn” will help you figure out the causes.
- Pests and diseases. Check the leaves – especially the undersides – and the soil. You can read about the most common issues here: Fungus Gnats and Broad/Russet Mites.
- Lighting schedule. An incorrect lighting schedule – where you provide too many or, conversely, too few hours of light – can lead to problems during the plants’ growth and flowering stages. Review the Cannabis Light Schedule guide.
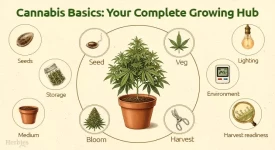
The sooner you spot a problem, the easier it will be to fix and the less damage it will cause, so stay vigilant. The Top 7 Growing Mistakes is a great place to test your knowledge. You can also find general information on all stages of cannabis cultivation, as well as links to more detailed guides, in our Cannabis Basics guide.
Still have questions? Contact our consultants and describe the problem. They'll help you figure out what's wrong and suggest possible solutions. The fastest way to get help is via live chat.
Cannabis Seed Types & Choosing Strains
What are the main types of cannabis seeds and how do they differ?
Generally, there are four main types of seeds:
- Feminized: These seeds produce only female plants. Consequently, they are purchased for the purpose of harvesting – there is no risk that a male plant will grow and pollinate your entire crop.
- Regular: Both male and female plants can grow from this type of seed. Regular seeds are usually purchased for breeding and creating new strains.
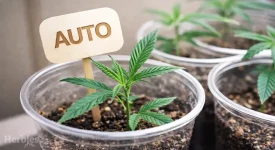
- Autoflowering: The growth cycle of plants that grow from autoflowering seeds doesn’t depend on the light schedule. They begin to flower at a specific time, regardless of whether you’ve switched to a 12/12 light schedule or not.
- Photoperiod: The classic type of strain in terms of growth and development – this is exactly how nature intended them to be. They require a change in the light schedule to begin flowering (for example, from 18/4 to 12/12).
Each type of seed has its own advantages and disadvantages, which depend entirely on your goals – whether that’s a high yield, ease of cultivation, or speed of maturation.
Which strains are easiest for beginners to grow?
There are strains that are more resilient and forgiving of growing errors – such as Northern Lights, White Widow, Blue Dream, and Critical genetics. We have included such strains in our selection for beginners.
In general, the growing process will be easier if you choose hardy strains that tolerate fluctuations in temperature and humidity, resist pests and mold, and have a predictable structure and size (shorter plants are usually easier to manage). If you aren't confident in your ability to properly manage light cycles, consider autoflowering strains.
How many seeds should I start with?
If you are a beginner, start with 2-3 strains. This is an optimal amount for a beginner's setup; it doesn't require much space and allows you to gain experience without excessive financial or time commitments. Once you feel more confident, you can get more seeds – especially since buying in larger quantities is usually more cost-effective.
Indoor vs Outdoor Growing
Should I grow indoors or outdoors as a beginner?
You can consider both options, but the experience will be completely different. When growing indoors, you have complete control over light, humidity, temperature, and plant growth – this is a great option if you want predictable results. At the same time, growing outdoors is cheaper and can yield a larger harvest if done in the right climate and at the right time. Compare both options in our seed-to-harvest guide.
How much space do I need to grow weed at home?
Most varieties don't require too much space. One plant needs 60x60cm (2x2ft) – calculate the area based on this. In general, if during the process of growing you feel that there is not enough space, you can resort to training techniques.
What kind of space do I need to grow cannabis indoors?
Any well-ventilated space with proper lighting will work. It could be a small room, a grow tent, or even a closet. The main thing is to keep privacy in mind. Grow tents are a great option for beginners – though you’ll need to invest in purchasing and setting one up. However, if you’re not yet sure you want to spend extra money on this venture, a DIY space will work just as well, as long as you can ensure proper ventilation and a stable temperature. Read here to find out what you’ll need and how to grow indoors.
Do I need a grow tent or can I use a closet?
A grow tent makes growing easier – it usually comes equipped with essential features such as reflective walls, built-in vents, and easy light control. But you can also set up a closet properly – you just need to make sure it has good ventilation and proper lighting. Which option is better? It depends on the budget you’re willing to set aside for your grow room. But if you’ve decided on a closet, read our article to learn how to set it up properly.
Equipment, Setup & Budget
What equipment do I need to grow cannabis indoors?
You don’t need a large investment to start growing cannabis. All you’ll need to get started is the right lighting, suitable pots, a timer, and good ventilation. With this simple set of equipment, you’ll be able to get a decent harvest, and once you’ve succeeded with your first harvest, you can think about upgrading your setup.
If you want to upgrade your setup, it would be a good idea to buy a few fans, a carbon filter, and humidity and temperature sensors. However, the most important thing to remember is that you don’t have to buy everything right away.
What’s the best grow light for beginners?
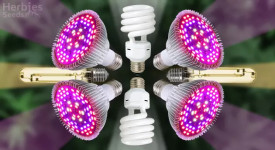
Choosing the right lighting is very important during the early stages of growth. These days, many growers prefer to use LED lights not only because of their efficiency but also because they are fairly easy to install to prevent overheating, and because they provide a light spectrum that suits all stages of cannabis growth. In addition, they are more cost-effective in terms of electricity consumption and plant cooling.
However, every lighting system has its pros and cons. Some growers prefer HID or CFL lamps, but their installation and temperature control require more attention than is the case with LED lamps.
How do I choose the right container size for my plants?
Choosing the right container plays a crucial role in growing plants, as the pot’s volume will determine the size of the plant you can grow. When growing indoors, your pot should have a volume of approximately 10-20 liters (3-5 gallons). This ensures the plant’s root system has enough room to develop without taking up too much space in the growing area. A pot that is too small will prevent the roots from developing properly, while a pot that is too large will make it difficult to water and fertilize the plant. Also, remember to plant only one seed or seedling per pot – no more than that.
Which soil is best for growing cannabis?
Soil quality can make or break a grow. Cannabis likes a light, fluffy mix that drains well while still holding enough moisture. Many beginners choose pre-made “super soils” that already contain nutrients for the first few weeks. This takes some guesswork out of feeding and lets you focus on observing your plants rather than measuring fertilizers right away.
However, not all soils sold in garden centers are suitable. Heavy mixes designed for flowers or houseplants can suffocate cannabis roots or hold too much water. If you’re unsure, it’s better to choose a soil specifically recommended for cannabis or to build your own with components like peat, coco coir, perlite, and compost. With the right base, your plants will reward you with steady growth and fewer problems down the line.
Do I need special nutrients or fertilizers?
Yes, cannabis thrives when given the right nutrients at the right times. During the vegetative stage, the plant needs more nitrogen to grow leaves and stems. Once it starts flowering, it shifts its appetite toward phosphorus and potassium to build buds. That’s why most nutrient packs come in separate “veg” and “bloom” formulas.
The good news is you don’t need to overcomplicate things. Beginners often do best with simple, all-in-one kits or organic blends that are forgiving if you use a little too much or too little. Overfeeding is actually a much more common mistake than underfeeding, leading to “nutrient burn” that shows up as brown leaf tips. By starting light and adjusting gradually, you’ll quickly learn to read your plants and understand exactly what they need.
How much will it cost to set everything up?
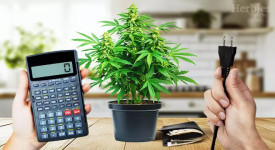
One of the most common questions is about the budget. A small, functional indoor grow can be started for around $150 to $300, depending on what equipment you choose. This usually covers a tent or growing space, a decent LED light, basic ventilation, and containers with soil. Outdoors, costs are often much lower since the sun provides free light and natural airflow.
The important thing to remember is that spending more doesn’t automatically mean better results. Prioritize good lighting and a stable environment – those two factors alone often decide the outcome of your harvest. Everything else can be added over time as you refine your setup. Many successful growers start small, learn what works best for them, and then gradually upgrade their equipment as they go.
Starting Your Grow: Germination to Veg
How do I germinate my seeds properly?
The paper towel or water-soaking method works best. Keep the seeds warm, moist, and dark until the root tip appears. Then, carefully place them in soil or your chosen medium. The process sounds simple, but small mistakes can reduce success rates. Want a step-by-step walkthrough with pictures? See our germination guide.
How long does germination take?
Most seeds sprout within 1-5 days, though older seeds can take longer. Patience is key, and keeping conditions steady makes a big difference. If your seeds take more than a week, it may point to environmental issues.
When should I transplant my seedlings?
Once seedlings develop a few sets of leaves and their roots fill the starter container, they’re ready to move into a larger pot. This gives the roots more room to grow. Transplanting too early or too late can slow development. Want a step-by-step transplanting guide with signs to watch for? Check our transplanting guide.
How often should I water my plants?
Water only when the top inch of soil feels dry. Overwatering is the #1 beginner mistake, as it leads to root problems. Different stages of growth require different watering amounts, so learning to “read” your plant helps a lot. Want practical watering tips and examples? You’ll find them in our seedling-care guide.
How do I know if my plant is healthy during veg?
Healthy plants grow steadily, with strong stems and deep green leaves free of spots or droopiness. Any discoloration or curling is usually a sign that something needs adjusting. It’s easier to correct problems early, so regular observation is essential.
How can I tell the sex of a cannabis plant?
Look closely at the nodes (where branches meet the stem). Females show white hairs (pistils), while males form small round balls (pollen sacs). Identifying sex early helps you remove males before they pollinate females.
Flowering Stage & Plant Care
What should I know about the flowering stage?
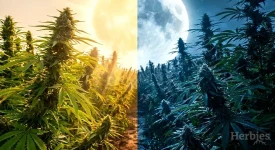
This is when your plant shifts energy into bud production. Photoperiod strains need a 12/12 light cycle, while autoflowers keep blooming under 18/6. Humidity should be lowered to prevent mold. It’s an exciting stage, but also one where mistakes show quickly. Want a week-by-week breakdown of what happens during flowering? Check it here.
How should I adjust lighting during different growth stages?
- Vegetative: 18 hours light / 6 hours dark.
- Flowering: 12/12 for photoperiods.
- Autoflowers: can stay at 18/6 throughout.
Light is the engine of growth, so small adjustments can have big effects. Want more details on how light spectrum and intensity affect plants? See the extended section.
Why are my plant leaves turning yellow?
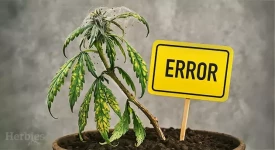
Sometimes it’s natural – especially late in flowering when the plant moves energy to the buds. But yellowing can also signal issues like nutrient imbalances, overwatering, or stress. The key is identifying when yellowing is harmless vs. when it needs fixing. Want a visual guide to the different causes of yellow leaves? Check our guide.
How do I deal with pests or mold on my plants?
The earlier you spot them, the easier they are to handle. Improving airflow, lowering humidity, and using safe treatments like neem oil or sticky traps usually works. Left unchecked, pests and mold can ruin a grow.
Do I need to trim or train my plants?
Yes. Removing excess leaves and gently bending branches (known as LST, topping, or ScrOG) helps light reach more bud sites, boosting yields. Training doesn’t have to be complicated, and even beginners can do it successfully. Learn about LST and other training methods here.
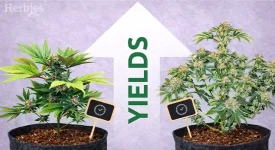
How do I boost yields during flowering?
Strong light, healthy feeding, and smart training are the main factors. Keeping your plants stress-free during this stage is just as important.
Harvest, Drying & Curing
How do I know when my plants are ready to harvest?
The easiest way to judge ripeness is by looking at the trichomes, those tiny resin glands that cover the buds. When they’re still clear, the plant isn’t ready; when most of them turn cloudy, you’re at the peak of potency. If some start shifting to amber, the effect will be more relaxing and heavy. Pistils, the little hairs on the flowers, also tell a story: once the majority have darkened and curled in, it usually means the plant is reaching its final stage.
Still, no single sign is perfect. Some strains hold onto white pistils longer, while others ripen fast. That’s why experienced growers combine different indicators: swollen calyxes, the overall look of the plant, and, of course, the trichomes themselves. Taking a little extra time to check these details can make the difference between a good harvest and a great one.
What’s the best way to harvest cannabis buds?
Harvesting might look simple – cut the plant and hang it up – but the way you handle your buds in these first hours has a big impact on flavor and potency. Always cut branches gently and hold them by the stem, not the flowers. From here, growers choose between two main styles. Some prefer to trim the leaves right away while the plant is still moist, which speeds up drying and makes trimming easier. Others leave the leaves on until after drying, letting the process take longer but often preserving more aroma.
Whatever method you choose, the key is to keep everything clean, dark, and at the right temperature. Light and heat break down the compounds you’ve worked so hard to grow, while a dusty or humid space can invite mold. A little care during harvest ensures that your buds stay as close as possible to their peak quality.
What’s the right way to dry and cure cannabis after harvest?
Drying is about patience. After cutting, buds should spend a week or two in a cool, dark, and well-ventilated space. The ideal sign that they’re ready for the next stage is when small stems snap instead of bending. At that point, you move on to curing – the step that transforms raw flower into smooth, flavorful cannabis.
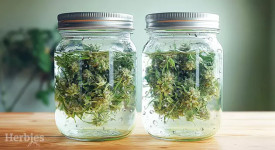
Curing means sealing the buds in airtight jars and letting them slowly release moisture over time. At first, jars are opened daily to “burp” them and prevent excess humidity. Later, openings become less frequent. This stage can last anywhere from two weeks to two months, and the longer you allow, the better the final result will be. Many growers say that curing is where the real magic happens, turning grassy-smelling buds into aromatic, potent flowers.
What are the risks of drying and curing incorrectly?
If you rush drying, the result is usually harsh smoke with little aroma. Dry too slowly, and you risk mold, which can ruin your harvest completely. Even curing too quickly (or not curing at all) can make buds taste flat and unfinished. These mistakes are frustrating because they happen right at the finish line, after months of work.
That’s why experienced growers often say drying and curing are just as important as the grow itself. With a bit of patience, you can avoid the most common pitfalls and bring out the full potential of your plants.
How long does curing usually take and why is it important?
A proper cure takes at least a few weeks, but many growers keep their jars sealed for six to eight weeks before they’re satisfied. During this time, the last traces of chlorophyll break down, and the flavor profile fully develops. The difference between a bud smoked after one week and the same bud smoked after two months can be dramatic – smoother, tastier, and often stronger in effect.
That’s why curing is sometimes called the “hidden step” of growing. You don’t see much happening from the outside, but inside the jar, the cannabis is transforming. For anyone serious about quality, patience here is one of the best investments you can make.
Yields, Potency & Sustainability
How much yield can I expect from one plant?
There’s no single answer, because yield depends on many factors – genetics, the amount of light your plants receive, how much space they have to grow, and how long you let them develop before flowering. A small indoor plant under a modest light might only produce a handful of buds, while the very same strain outdoors, in the ground with plenty of sun, can yield hundreds of grams.
For beginners, it’s best to think in terms of ranges rather than promises. Indoor plants in a tent or closet often give anywhere from 30 to 200 grams, depending on setup, while outdoor plants in good conditions can easily exceed half a kilo. The real takeaway is this: the more you fine-tune your environment and the healthier your plants are, the closer you’ll get to the higher end of those numbers.
How can I estimate the potency of my homegrown weed?
The starting point is always genetics. A strain with a reputation for strong THC levels won’t suddenly turn weak just because it’s grown at home, although your environment can influence the final result. The real trick is in timing the harvest. Trichomes (the tiny crystals covering the buds) give the best clues. When they’re mostly cloudy, the effects are usually at their strongest. Wait a bit longer until some turn amber, and the effect shifts toward a heavier, more relaxing high.
Of course, the only way to know the exact percentage of THC or CBD is through a lab test, but most home growers judge potency by observation and experience. The smell, smoothness, and overall effect are reliable guides. If your buds taste rich, burn evenly, and deliver the kind of effect described for the strain, you can be confident you’re close to the potential written on the seed pack. Curious about how harvest timing and curing can nudge the effects one way or another?
Is it possible to reuse soil for future grows?
Yes, and in fact, many growers swear by it. Good soil is alive with microbes, and when refreshed properly, it can become even more fertile over time. After a harvest, you can remove old roots, mix in new nutrients or compost, and let the soil rest before planting again. Done right, this not only saves money but also reduces waste, which makes it a more sustainable way to grow.
That said, reusing soil isn’t always risk-free. If your previous crop suffered from pests, mold, or nutrient imbalances, the problems can carry over. That’s why some growers prefer to sterilize or amend their soil carefully before giving it another run. Others choose to keep a “living soil” approach, where the microbial community is preserved and nurtured with every cycle. Either way, the idea is the same: healthy soil can serve you for more than one harvest, provided you give it the care it needs.