


Space Buckets – A Space And Cost-Efficient Way To Grow Cannabis

Ever wish that you could build your own cannabis garden, but lack the money or space to do so? Enter the space bucket. Space buckets are a great way to familiarize yourself with building a garden and maintaining cannabis plants, so check out our space bucket guide here for everything you need to know.
Space Buckets – What Are They?
In simplest terms, a space bucket is a self-contained grow room for a single plant. They’re easy to make, simple to manage, and you can automate them fairly easily. Each space bucket can yield between 1 and 2 ounces (about 28 to 56 grams) every harvest. Space buckets are also fairly cheap to construct – you can put together a respectable space bucket for about $100.
What Are The Benefits Of Growing In A Space Bucket?
Growing weed in a space bucket offers several advantages over other types of indoor gardens. Their combination of low startup cost, stealthy nature, and the ability to provide total control over the growing environment make them attractive to new growers and veterans alike.

Low Cost
A space bucket’s low cost is definitely one of its selling points. While you can spend thousands of dollars putting together a grow tent or converting a room of your house into a garden, you won’t spend more than $100 or $200 on a space bucket. They also use significantly less power than a larger-scale grow, so you’ll be able to keep your utility bill manageable.
Discretion
In addition to being relatively cheap, space buckets are easy to conceal. This makes a space bucket grow perfect for someone who lives in a densely-populated area. While installing a tent in one of your rooms will leave your entire home smelling like weed, a space bucket can keep smell to a minimum. Because they’re entirely self-contained, you can even have visitors over without having to fear for your garden’s discovery.

Total Control
Because they have such a small footprint – each bucket is only 5 gallons (20 liters) – it’s easy to control every cubic inch of the environment inside a space bucket. Whereas many grow rooms can have spaces of stagnant air, hot or cold patches, or light leaks, space buckets maintain a fairly uniform environment. This will give you a consistency that’s difficult to replicate in larger gardens.

How To Make Your Own Space Bucket
No experience? No problem! Even if you have zero background in growing cannabis and no idea how to create a garden, you can learn how to build a space bucket. This makes it an attractive option for first-time growers who want to get their feet wet.
Parts And Components
To build your own space bucket, you’ll need a few basic materials. For this example, we’ll build a two-bucket system. You’ll need:
- 5-gallon (20 liter) buckets (x2)
- 5-gallon (20 liter) bucket lid (x1)
- LED grow light – 180 watts
- Small fans (x2)
- Electrical timer
- 6mm bolts with nuts and washers (x4)
- Rope – 3 feet (1 meter)
- Spray-on glue
- Silicone sealant
- Duct Tape
- Rotary tool
- Drill
- Screwdriver
- Razorblade
- Sharpie or marker
- Measuring tape
- Mylar
- Power strip
- Personal protective equipment (work gloves and safety glasses)

Step One – Build Drip Tray
First, draw a horizontal line 3 inches (8 centimeters) from the bottom of one bucket. Then, use the rotary tool to cut along the line. You’ll use the bottom of the bucket to collect water. The top will contain garden components.

Step Two – Make Holes For Drainage
Take the second bucket (the one you didn’t cut) and drill 12 holes across the bottom. These holes will drain into the drip tray.

Step Three – Attach The Buckets
Drill 4 holes about an inch and a half (4 centimeters) from the top rim of the bucket that you didn’t cut. Thread a bolt through each hole. Tighten with nuts and washers. Rest the top section of the cut bucket on top of the bolts. Then, mark the position of the bolts with the marker and extend it into an “L” shape pointing in the same direction. Using the rotary tool, cut the shapes out to a quarter-inch (6 millimeter) thickness. You can now attach the top and bottom pieces together using the bolts.

Step Four – Cut Out Slots For Fans
Use the fan as a template and trace an outline around it about 3 inches (8 centimeters) from the top rim of the bottom bucket. Using the rotary tool, cut out a hole for the fan. Drill mounting holes for the fan. Do this for the top bucket section as well.
Step Five – Space Bucket Lighting
Mark where the LED light’s mounting holes are on a piece of paper. Using the paper template, trace the outline onto the lid. Drill out mounting holes. Unscrew the top of the LED light. Screw holes through the top of the bucket and attach the LED to the space bucket lid.

Step Six – Line With Mylar
Spray glue over the inside of buckets and attach the mylar. If you have any other holes in the buckets, cover them with duct tape.
Step Seven – Seal Buckets Together
Lock the top and bottom buckets together using L-shaped channels and bolts. Using duct tape and rope, create a lightproof seal between the two buckets.
Step Eight – Install Fan
Mount the intake fan onto the bottom bucket using bolts, washers and nuts. Mount the exhaust fan to the bottom bucket. If there are any gaps, fill them with the silicone tube.

Step Nine – Assemble
Place attached buckets onto a drip tray. Plug LED into timer and timer and fans into the power strip. After that, you’re all set to add a plant!

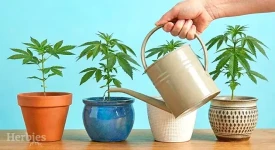
Space Bucket Tips And Tricks
Now that you’ve assembled your space bucket, it’s time to grow your weed. Here are a few tips to optimize your grow.

Use LST
One of the issues you need to overcome when growing in a space bucket is height. You won’t have much height to work with, so focus on growing your plants wide instead of tall. Utilize low-stress training (LST) to maximize space in your bucket. You can do this by tying branches down. Because they grow short and bushy, Indica strains are probably the best option for space buckets.

Switch To Flowering Early
Because you don’t have as much space to work with, you should consider switching from veg to flower earlier than you would in a taller garden. Vegetative growth stacks on the most height to your plant, and after the first 2 weeks of flower, your plants will barely stretch at all.
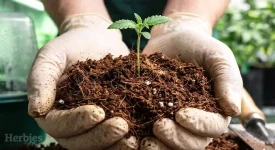
Plant In A Separate Bucket
Don’t plant your weed directly into the bottom of your space bucket. Instead, root your plant in a smaller container and place this in the bottom of the bucket. That way, if something happens to your plant, it’ll be simple to remove and replace. It’s also much easier to clean your space buckets between harvests using this technique.
Extra Fans For Airflow
Even with the low heat output of LED lights, the temperature inside a space bucket can get dangerously high. If you notice the temperature inside your space bucket getting higher than 80 degrees Fahrenheit (about 26 degrees Celsius), you can add more fans to increase airflow. To add fans, simply cut more intake and exhaust ports and bolt the fans to your bucket.
Wrapping Up
Space buckets are a great solution for any grower trying to create an inexpensive and compact garden with a low energy footprint. If you’re a new grower trying to build your first garden, the skills you develop while building a space bucket will serve you well in future projects. Good luck!
Herbies Head Shop expressly refuses to support the use, production, or supply of illegal substances. For more details read our Legal Disclaimer.
- Shared on Twitter
![icon]()
- Shared on Facebook
![icon]()


Thank you for leaving a comment for us!
Your feedback will be posted shortly after our moderator checks it.
Please note that we don’t publish reviews that: