How To Grow Marijuana Properly
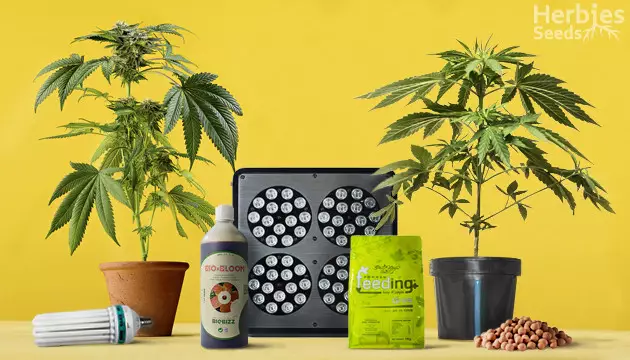
Growing cannabis is one of the most rewarding things you can choose to do. This enjoyable pastime will leave you enriched with a repertoire of cannabis knowledge and buckets of cannabis buds to be used in any way you like. But before you get down to business, let's take a look at everything you need to take into consideration and find the best growing option to fit your intentions and available means.
Step 1: Consider Cannabis Cultivation Laws And Regulations
Before you start growing marijuana, the first things you need to consider are the laws and regulations controlling the distribution of weed seeds and cannabis cultivation. These vary greatly from country to country, and you’ll need to take precautions according to your local laws.
For example, both buying seeds and growing cannabis is legal in Canada, whereas if you’re a citizen of the U.S., it’s going to depend on what state you’re in. For instance, growing for both recreational and medicinal use is legal in Massachusetts and California, but Arizona and Texas only allow growing cannabis for medicinal purposes. For more information on the jurisdiction behind growing weed and purchasing seeds in the U.S., read our full guide “Is It Legal To Buy Cannabis Seeds In The U.S.?”
Step 2: Choose A Grow Space: Indoors Or Outdoors
Finding the right grow space is the next step in your cannabis growing journey. Whether you choose to grow outdoors or indoors truly depends on what you have available and what direction you want to steer your grow in.
Growing Cannabis Outdoors
If you’re a first-time grower, buying some of the tools needed for cultivation may require large investments. The good news is that with the outdoor setup, you can save on inventory like grow boxes, light bulbs, ventilation, etc., as all you need is already there: an all-natural lighting source, pure water, and soil. You can grow your plants in your back yard, terrace, roof, or on a balcony. Just make sure that your cannabis plants are covered up, hidden, or camouflaged, as some strains tend to be very pungent and tall toward the end of flowering and may draw unwanted attention.
Meanwhile, outdoor growing has traps and pitfalls that you need to consider for a healthy grow:
- Consider Weather Conditions
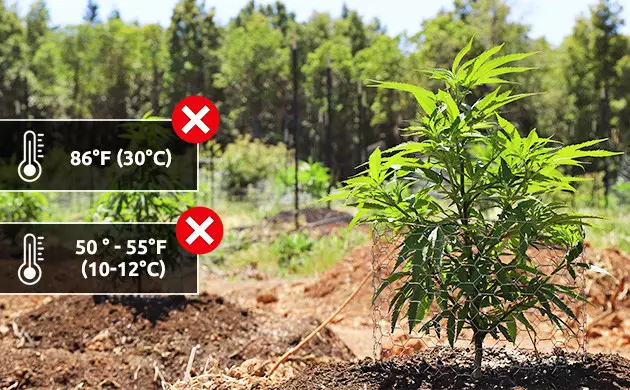
Growing cannabis in its natural environment requires a good understanding of the local climate. Most cannabis plants can adjust to different growing conditions, but extreme weather can affect their growth and influence your yield.
For example, sustained temperatures above 86°F (30°C) can slow down the plants’ growth, while temperatures below 50-55°F (10-12°C) can damage or even destroy your plants altogether.
Other weather conditions like heavy rain, hail, or high wind can lead to physical damage of plants’ foliage. Excessive moisture can result in mold, mildew, and other diseases that will affect the overall quality of your crops. Besides the weather patterns, it’s important to take into account seasonal changes and the length of the day in terms of daylight – when deciding on what strain to grow, make sure the climate of your area provides enough warm and sunny days for cannabis plants to fully mature.
- Think Of Pest And Predator Control
Protecting your cannabis plants from pests and predators is another challenge related to the outdoor setup. Depending on the area you live in, you may have to protect your garden by building a fence to cover your crop from large animals. You may also have to deal with all kinds of insects.
Growing Cannabis Indoors
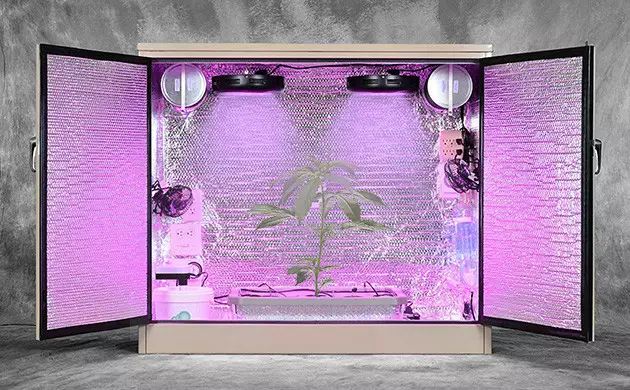
Unlike outdoor growers, who need to foresee weather conditions and other nature-related factors, indoor growers have the ultimate control over their environment. With precise control over humidity levels and a fine-tuned temperature regime that’s combined with regular water and nutrient intake, indoor grows tend to run a little more smoothly than their outdoor counterparts. Here are the key considerations before commencing an indoor grow:
- Provide Enough Growing Space
Indoor growers usually need 3’x3’x6’ (90x90x180m) to grow a full-size plant; however, smaller tents can be used to make the most of even the smallest space. Microgrowing is also an option, which lets growers use spaces as small as a PC box to grow a small cannabis cultivar.
- Right Level Of Privacy
Most people opt to cultivate indoors for the relatively easy level of stealth growing. Carbon filters and other equipment can help deal with the smell issue. Of course, this will require some investments, while outdoor growers can use less expensive precautionary measures – for example, growing auxiliary plants such as tomatoes to camouflage cannabis plants.
To help you settle on your ideal growing environment, we’ve made a short clip on what gear you’ll need to grow indoors and outdoors. For more info, keep reading this post – there are some pretty useful tips and tactics over there!
Step 3: Pick A Growing Medium
Over the years, many media have been used to grow cannabis – with some being better than others – ranging from traditional organic soil grows to modern hydroponic techniques. These can be as simple as a wicking system all the way up to an advanced, mainly-automated DWC system, providing your plants a constant supply of nutrient-rich water to help them grow larger and more fruitful.
Soil
Soil is the most traditional way of growing cannabis, as it has been for thousands of years. Soil growers take a different approach to soilless/hydroponic growers because many nutrients the plant may need throughout its lifetime are already in the soil before the seed/plant goes in. Not only does this mean you won’t have to worry about feeding your plant the necessary nutrients every week, but if you’re growing in a special pre-made soil mix for cannabis, it also saves on ongoing costs and stretches your money further.
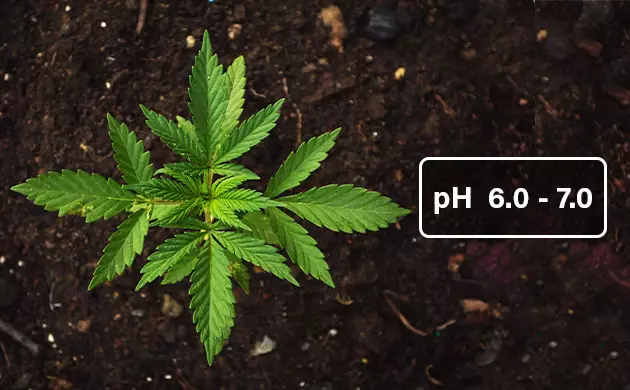
If you use organic soil enriched with compost and various beneficial microorganisms and fungi, another benefit of soil will be the lack of a need to pH-feed the water, as the microbial systems in the root zone can buffer pH changes to a neutral 6.0-7.0 pH with ease. If you like the sound of that, you’ll love hearing that organic grows also tend to yield flowers with the best smell and taste – a well-refined flavor profile characteristic of the strain!
Pros:
- No need to feed throughout grow – make sure to create a high-quality soil mix before commencing your grow to get sustained release of vital nutrients throughout your plant's lifecycle.
- More forgiving of pH fluctuations.
- Excellent smell and taste.
- Great resin production.
Cons:
- Requires good soil selection or even mixing prior to starting.
- Slower growing method.
Hydroponics
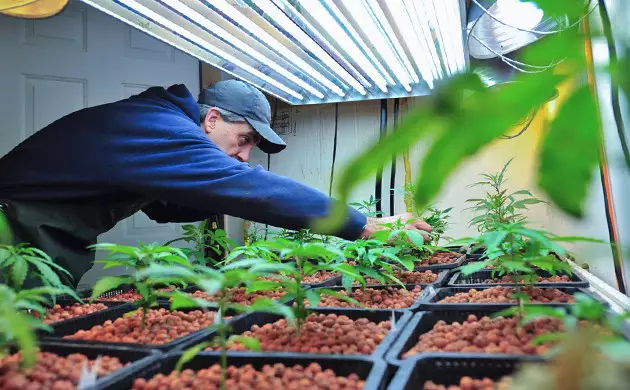
Hydroponic cannabis growing systems are some of the most popular ways of growing in the world because advancements in technology have made them more accessible. It’s also a more sophisticated system usually consisting of pumps and reservoirs filled with water or other media that’s different from soil. This aims to maximize the uptake of nutrients, which growers have full control over. The most popular types of hydroponic systems are:
- Soilless
Soilless systems are considered hydroponic due to the absence of an organic growing medium. The most commonly used combinations are coco coir mixed with either perlite or vermiculite (porous mineral rocks). This leads to a permeable growing medium, which allows for aeration of the roots and excellent drainage and minimizes the risk of root rot and similar moisture-related issues.
- Deep Water Culture (DWC)
Quite possibly the simplest truly hydroponic system, a DWC setup consists of plant roots suspended across a reservoir of continually aerated nutrient solution. This can be through multiple plants (in baskets of clay pebbles, rockwool, or other growing hydroponic growing mediums) in a single reservoir, or a system of plants in several different reservoirs.
- Ebb and Flow
Also known as flood and drain, ebb and flow systems are similar to DWC setups, but have periodic “flooding” of the growing tray followed by a “drainage” to remove the water and repeat the aeration process in an external reservoir.
- Drip System
Drip hydroponic systems are slightly more intricate and have a slow but constant supply of nutrient water dripping over the top of the roots from above, which leads to constant exposure to air and nutrients – everything a plant needs for steady, healthy growth.
- Wick System
Wick systems work exactly as they sound! Plants are held in buckets above reservoirs and wicks are partly submerged in nutrient solution to slowly transport water and nutrients to the root zone. This is an excellent way to increase time between watering, and can be used to keep your plants happy should you ever need to be away for a couple of days.
Step 4: Decide On Your Preferred Propagation Method
After you’ve decided on how to grow marijuana – in soil or hydro, outdoors or indoors – it’s time to decide what initial material you’re going to use for growing cannabis at home. There are several options we’d like beginner growers to consider:
Growing Cannabis From Seeds
This is by far the easiest method of growing marijuana for beginners. All you need to do to start is germinate cannabis seeds first. The whole process takes about one to two days for fresh seeds, or up to ten days for older cannabis seeds. There are plenty of ways to germinate cannabis seeds successfully – for the breakdown on all of them, check out our “How To Germinate Cannabis Seeds” article.
Cloning
Cloning cannabis is a more advanced technique of weed propagation, but beginners could try mastering this as well. Basically, you pick a healthy mature plant to use as a mother and take cuttings from it. You keep these in a solution until they root, after which you’ll have several more healthy cannabis plants ready to be transplanted to soil. We suggest cloning after growing from seeds so that you can grow cannabis non-stop.
Step 5: Choose Your Cannabis Strain
The next step in growing large, beautiful cannabis plants is choosing the right cannabis strain. With advancements in breeding technology, autoflowers are by far the best choice for both indoor and outdoor first-time growers, this due to their excellent resistance to stress-related issues and ability to deliver yields of potent cannabis flowers in less than 10 weeks from seed to harvest!
Heavy-Yielding Indoor Strains For First-Time Growers
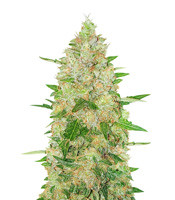

- Autoflowering
- Crushing blow
- 650 g/m² indoors
50 - 150 g/plant outdoors
Extreme Impact Auto from Heavyweight Seeds is an autoflowering cannabis strain that’s a cross between two incredible autoflowers – Mazar Auto and Fast and Vast. This Indica-dominant cannabis variety provides the best that each parent strain has to offer: heavy indoor yields of up to 2.13 oz/ft2 (650 g/m2), and high-quality resin-covered flowers packed full of rich lemony flavors and potent Indica effects.
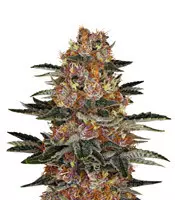

- Autoflowering
- Devastating delight
- 350 - 400 g/m² indoors
400 g/plant outdoors
Offered in a furious autoflowering format, Purple Punch Auto from Barney’s Farm is a fantastic-tasting cannabis strain with the crave-worthy flavor of a freshly baked apple pie. Reaching 28" (70cm) in height, this compact cannabis variety is a perfect match for an indoor grower! With potent yields of up to 1.15 oz/ft2 (350 g/m2) and a short 8-week flowering time, Purple Punch Auto is one of the most popular indoor autoflowers on the market.
XL-Yielding Autoflowering Strains For Outdoors
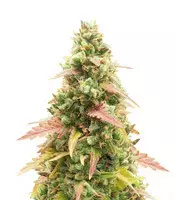
- Autoflowering
- Successive waves of high and stone
- 450 - 600 g/m² indoors
70 - 350 g/plant outdoors
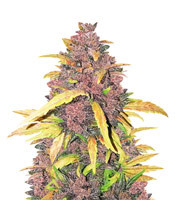
GG#4 Original Glue Auto is an autoflowering cannabis strain developed by FastBuds as a cross between the original GG#4 Original Glue and a Ruderalis. This Sativa-dominant autoflower is a surprisingly short 2-3' outdoors (60-100cm), does not need any special care, and gives off a magnificent lemon and pine aroma. Bringing in as much as 10.5oz/plant (300g/plant) after only 8-9 weeks from sprouting, GG#4 Original Glue Auto is a fantastic autoflower that adds a fresh touch to any grow space.
- Autoflowering
- 400 - 500 g/m² indoors
50 - 250 g/plant outdoors - Psychedelic trip
LSD-25 Auto is another sensational autoflower from FastBuds. This Indica-dominant autoflowering strain is a potent combination of LSD and Ruderalis genetics. An easy-to-grow strain, it boasts a rock-hard tolerance to harsh weather conditions and common growing mistakes. On top of that, LSD-25 Auto is a heavy producer, yielding up to 7oz/plant (200g/plant) outdoors by early October.
Step 6: Choose Grow Lights: LED, HID, Or Fluorescent
After you’ve chosen your dream cannabis strain, it's time to think about the grow lights for indoor growing. This choice is crucial, as the lights can make or break a cannabis grow.
LED Lights For Cannabis
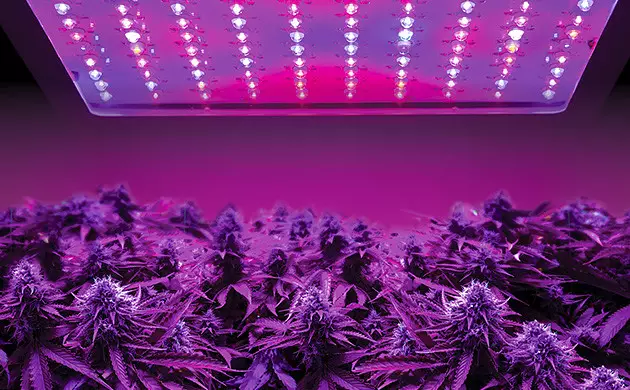
Newer alternatives powered using LED technology have vastly improved the efficiency of indoor growing. They have also led to mammoth improvements in the yields and quality of the cannabis produced. With good full-spectrum LED lights, you can expect to yield 0.5-1g per watt of light. Another awesome pro of LED lights is that they don’t heat up and are therefore suitable even for the smallest grow spaces.
HID Lights For Cannabis
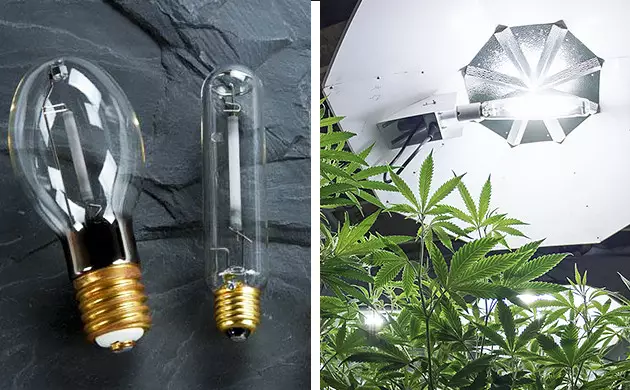
High-intensity discharge (HID) lamps are really powerful and often result in yields up to 1g per watt. However, alongside creating plenty of light, they also create a large amount of heat, which may need to be considered by those who are low on space.
Fluorescent Weed Lights
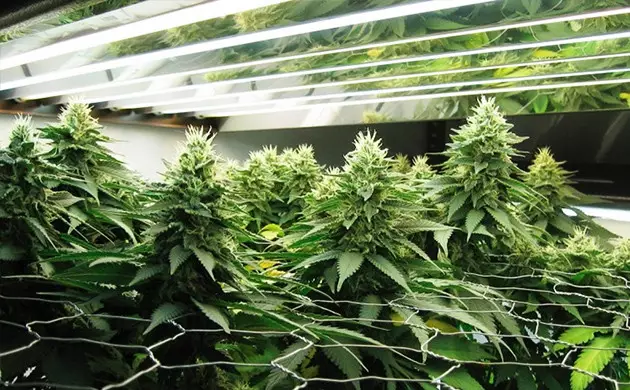
The most cost-effective and old-school lighting source is fluorescent lighting, whether that’s tube lighting or compact fluorescent light (CFL) bulbs. However, this type is rarely used outside of budget grow circles due to its incredibly poor light penetration and the large amounts of heat produced.
Step 7: Choose Nutrients: Organic Or Mineral
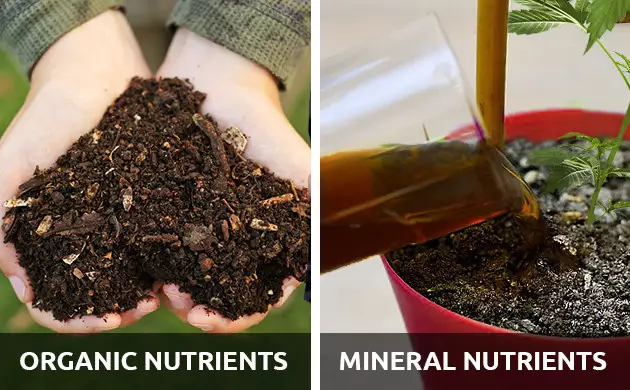
Organic Weed Nutrients
Those who opt for organic grows will love to hear all of the benefits of an organic nutrient feeding system. Most growers tend to make their own organic mix of nutrients from a range of sources and use this as the starting point for their own grows. Compost is perfect for making your cannabis healthy, and it’s impossible to overfertilize with it! This method’s few cons include higher costs, slower nutrient release, and the amount of time and effort it takes to make a mix.
Mineral Weed Nutrients
Mineral nutrients – those mixed with water – can be a great way to improve the performance of your plants. Growers who have a proper feeding regimen have been rewarded with great yields of dense cannabis buds. The only thing you should avoid is slow-release mineral nutrients, as it’s incredibly easy to overfertilize with these.
Step 8: Consider Time Limits And Season Length
The cannabis plant goes through various cycles post-germination before it’s ready to be harvested. These can be grouped into two stages: vegetative growth and flowering. Depending on the particular cannabis strain, each phase requires a certain amount of time to be completed – make sure, especially if you’re growing outdoors, that your area can provide enough warm days for these stages to be completed.
For The Vegetative Stage
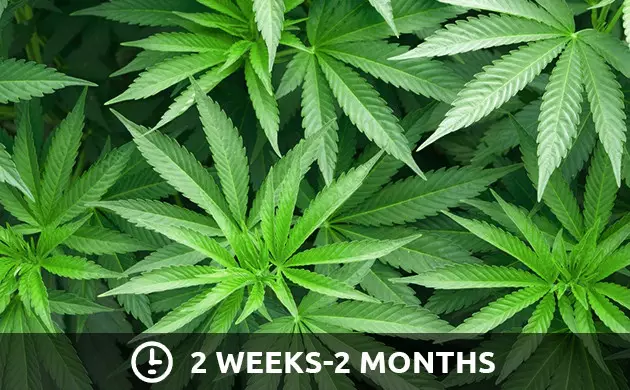
After germination, the seed should be placed inside a growing medium as soon as possible, and within a few days, a shoot will have broken through the surface. Over the coming weeks, this shoot will turn into the first few sets of leaves of your beautiful cannabis plant and eventually into a sexually mature plant. Depending on the strain you choose, the vegetative stage may take anywhere from a couple of weeks for autoflowering strains to a couple of months for large photoperiod varieties.
For The Flowering Stage
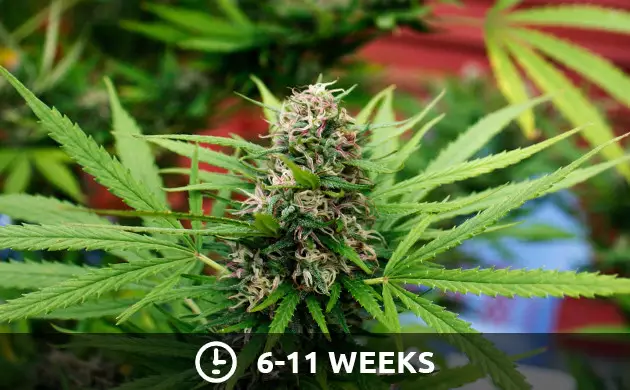
After the vegetative stage is over, the flowering stage begins. Autoflowers start flowering on their own, usually after 2-4 weeks of vegetation, and photoperiod strains begin this stage when they start receiving 12 or fewer hours of light a day – either naturally outdoors, or by light manipulation indoors (a simulation of the natural changes in daylight toward the first weeks of autumn). The flowering period for most indoor cannabis strains is between 6-11 weeks, with genetically Indica-dominant cannabis strains having a shorter flower period than their Sativa-dominant counterparts. To harvest potent, mature buds outdoors, you need to make sure that, during the last weeks of flowering, the weather outside will still be suitable for cannabis to fully mature.
Step 9: Consider Cannabis Plant Sex And Anatomy
If you think you don’t need to know about cannabis anatomy to grow weed, you might be wrong. While you don’t have to study tons of books to start growing, you definitely need to learn how to differentiate male from female cannabis, especially if you decide to grow regular rather than feminized seeds.
In order not to let male cannabis pollinate the rest of your garden and ruin your harvest, you need to be able to catch the first signs of male sex in cannabis. Normally, these don’t appear until the first weeks of the flowering stage. In the early stages of growth, both male and female pre-flowers look very similar. While female cannabis will go on to develop tear-shaped leafy bracts covered in resin, male plants will develop pollen sacs. These initially look like tiny balls or bulbs, but will grow bigger and eventually open to release pollen. You don’t want to let this happen! Once male plants are discovered, you need to rid of them.
To learn more about cannabis plant anatomy and how to sex your weed plants, read our “Male Vs. Female Cannabis” article.
Step 10: Don’t Forget To Implement Training Techniques
Whatever strain you choose to grow, the fact is you can always increase the yield by implementing training techniques into your cannabis growing routine. There are two major types of cannabis training: LST and HST.
LST
Low-stress training, abbreviated as LST, is similar to the art of bonsai but for cannabis plants. This is a special technique of bending and tying the plant’s branches and cola to give it the desired shape. LST will also help you get a lot of massive buds by leveling the crown of your plant so that the lighting is evenly distributed to all bud sites. LST is a cheap and effective training method suitable for all strains of cannabis.
Benefits Of Low-Stress Training
- Achieve much bigger yields without having to change your light or grow box.
- Have full control over the plant’s height, shape, and overall size.
- Plant will form many identical and fat colas instead of a single main one.
- Technique can be used on any cannabis strain.
HST
While requiring less equipment at hand than LST, high-stress training methods, or HST, are most often used in large-scale outdoor grows or by more experienced growers. HST is a more aggressive version of LST and should be done well into the vegetative stage on plants that are strong enough to withstand such levels of stress. There are several types of high-stress training:
- Topping and FIMming. These techniques include cropping the very top of the cannabis plant in a particular way to make the main cola develop into several colas.
- Supercropping. For supercropping, instead of tying the top and the branches of the plant like in LST, growers bend them so hard that the fiber inside breaks. Thanks to this method, the light will penetrate the bush evenly, and all the branches will then have the opportunity to grow at an equal pace and yield more.
Whichever training technique you choose to perform on your plants, don’t forget to do your research first. All of your questions regarding LST and HST are answered in this article.
Step 11: Harvesting, Drying, And Curing
Your cannabis growing cycle will end with some of the most important stages of it: harvesting, drying, and curing. Why are these stages so important? Because they greatly impact the potency and effects as well as the taste characteristics of your final product.
First, it’s important to harvest on time. To do so, you’ll need to watch your weed plant’s trichomes change color. It’s time to harvest when they turn from milky-white to amber. The darker they get, the more of a stoney effect your buds will develop. There are also other ways to know when and how to harvest cannabis, so to learn everything about it, go to our article dedicated to harvesting.
After harvesting, you’ll still need to spend several weeks on drying and curing your cannabis. These processes will activate the cannabinoids in the buds, making them more potent. They will also get dry and crispy, which will make the smoking experience much smoother and tastier thanks to the eradication of extra moisture. There’s a lot of nuance in how to dry and cure buds properly, so check out our Drying And Curing article to learn more about it.
Step 12: Do Your Research On Growing Weed
You should now have enough knowledge to successfully start your own outdoor or indoor cannabis garden. However, there’s still so much to learn about cannabis growing! Once you start your own garden, or even before that, go through our blog and pay special attention to articles on pest and disease control, various training techniques, and, of course, harvesting, drying, and curing. You can totally do it and harvest a potent yield you’re proud of – the most important thing is to spend lots of time with your plants and have fun!
Herbies Head Shop expressly refuses to support the use, production, or supply of illegal substances. For more details read our Legal Disclaimer.






Thank you for leaving a comment for us!
Your feedback will be posted shortly after our moderator checks it.
Please note that we don’t publish reviews that: