Dr Grinspoon Review: How I Grew This Beast Indoors in 24 Weeks

Greetings, growers! It took me close to half a year to raise this one-of-a-kind plant, but now it’s finally over, and I’m happy to share my Dr Grinspoon review.
Dr Grinspoon is a pure landrace Sativa with an extremely strong energetic high that can make even a long-time daily smoker dizzy after a couple of puffs. Growing Dr Grinspoon requires a lot of foresight, as her height can get out of control if you veg her for too long or fail to train her properly.
She’s a beast that’s hard to tame, that’s for sure, but for fans of heirloom Sativas, the results are well worth it.
Disclaimer: Cannabis products should be consumed responsibly and in moderation. Please be mindful of your tolerance levels and consult a healthcare professional if needed.
Dr Grinspoon Weed’s Deceptively Slow Start
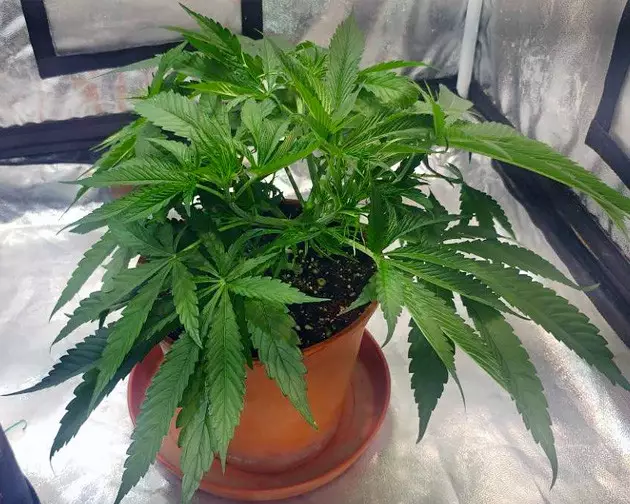
Before I began this Dr. Grinspoon grow, I had read enough about this Barney’s Farm’s strain to decide that it was best to grow just one plant, so I germinated only one out of my five-pack of Dr Grinspoon seeds.
Disclaimer: Before purchasing and growing cannabis seeds, ensure that cannabis cultivation is legal in your region.
I pre-soaked the bean for 15 hours in 100 ml of water, to which I added 4 drops of H2O2. Then, after 24 hours between paper towels, the seed, with a taproot already visible, went into a 1-liter pot filled with a 70/30 coco/perlite mix.
For the first two weeks, I watered the pot 2-3 times a day to 20% run-off using the following nutrients:
- Grotek Cal-Max to prevent any calcium, magnesium, and iron deficiencies that are so common in coco.
- House & Garden Roots Excelurator to stimulate explosive growth of the roots.
- everano Flower Power Start fertilizer to feed the seedling with an NPK of 11-40-13 and further stimulate root growth with mycorrhizae and probiotics.
Disclaimer: Ensure that all nutrients and supplements are used in accordance with manufacturer guidelines and that waste is disposed of safely to avoid environmental harm. Consider eco-friendly alternatives where possible.
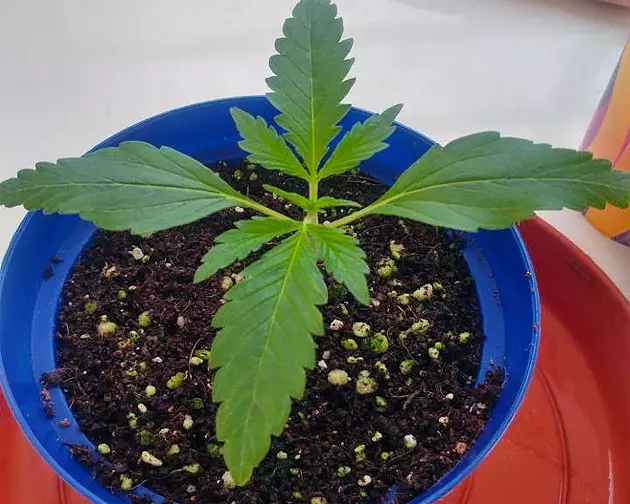
In week 3, I replaced Start with Grow (NPK 19-5-20), hoping to boost the growth of foliage now instead of the roots. Throughout the whole lifecycle of Dr Grinspoon, I fed her more lightly than any strain I had grown before.
All this time, the seedling stayed very small and developed very slowly, although she looked quite healthy. The reason may have been the low temperature in the grow tent, and this is a tropical variety, but I’m not sure that was why.
Every Dr Grinspoon review I read came with a warning about how tall this strain could get, and I knew I should top her, but she seemed too small to further stress her with topping. I thought I could get away with simple LST.
LST Seems Inadequate for Dr Grinspoon Strain
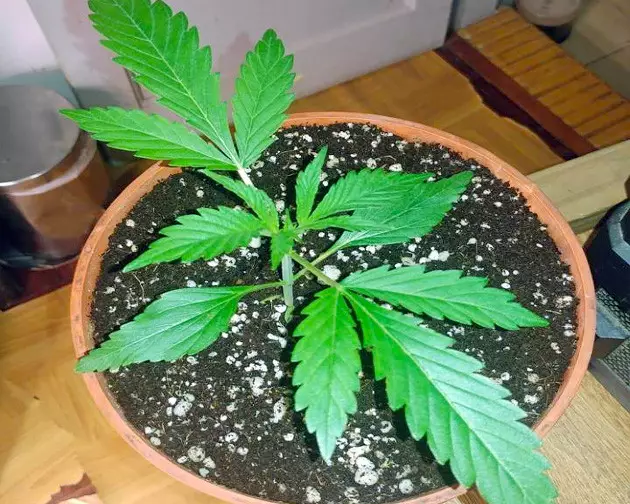
I started to low-stress train my Dr Grinspoon plant as soon as I transplanted her into a bigger 3L pot. I also moved her to an 80x80x160cm Darkbox tent, which was to be all her own. This tent is enough to fit 4 ‘normal’ plants such as White Widow, but Dr Grinspoon strain is anything but normal (as you’ll soon see).
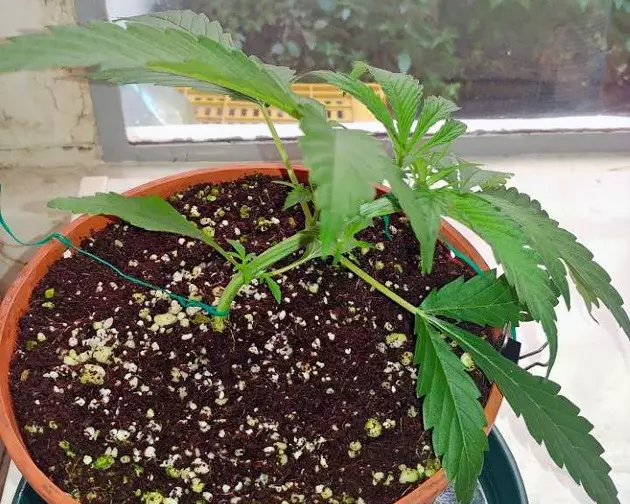
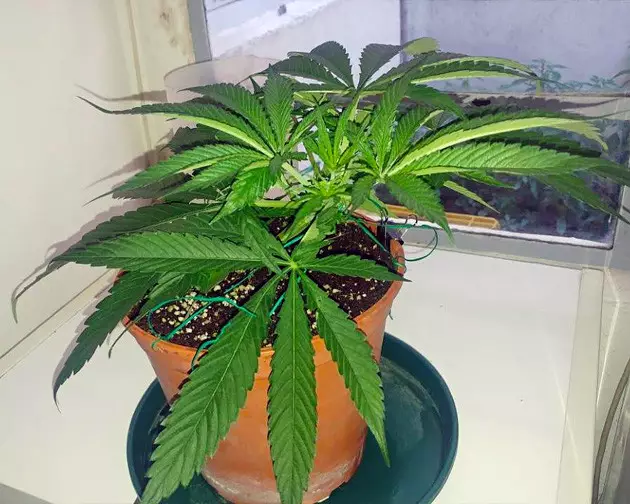
At first, I simply bent the main stalk and tied it down. Out of each pair of side branches, I left the one facing up and cut off the other one. Then I began to form my plant into the shape of a spiral. The growth quickened a bit, and I further boosted it with Grotek Vitamax Plus, which is said to aid in the formation of chlorophyll.
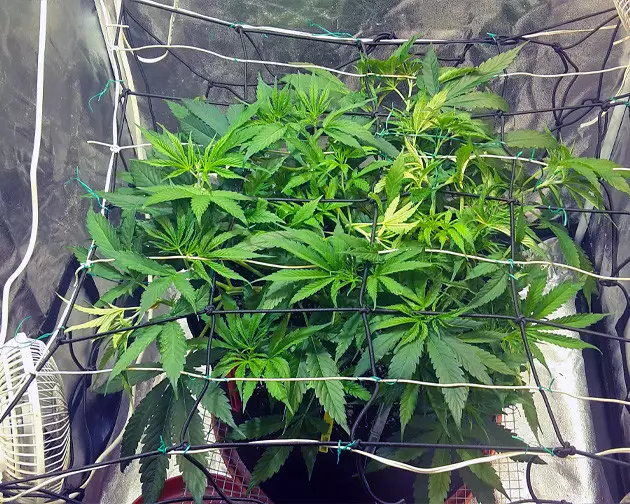
By week 7, when it was time to transplant my Dr. Grinspoon weed again – this time into a 10-gallon (37.85-liter) fabric smart pot – I finally saw the need to top her in several places. Now the plant was a neat, full, and round bush, and I installed a ScrOG net above her. I also had to supercrop some branches and occasionally bandage them with tape in places where they broke.
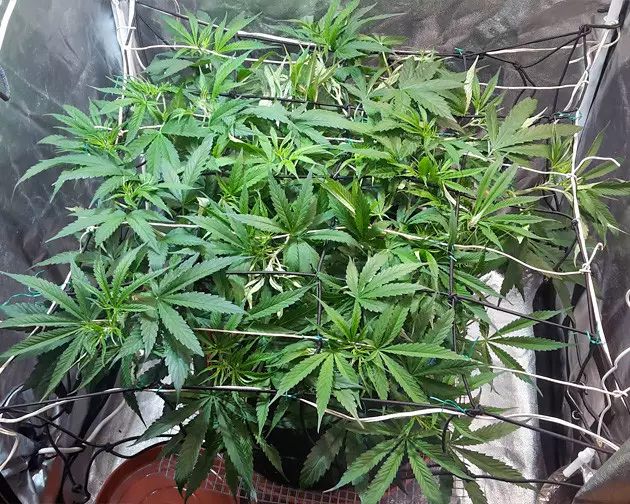
The slow growth of the first weeks seemed like a distant memory. Now my Dr Grinspoon plant was unstoppable. The main shoot was especially stubborn; whatever I did to direct it sideways and slow it down, it kept bouncing back. In week 9, when the ScrOG net was filled more than 60%, there was nothing left for me to do but to switch to 12/12.
Dr Grinspoon Genetics Cause Massive Stretch
In my original Dr Grinspoon strain review, I expressed regret on several occasions that I didn’t flip to 12/12 earlier. This beast seems to just stretch non-stop! By the end of the Dr.Grinspoon grow, I thought I should have started this beast 12/12 from seed. I also regretted giving her roots so much space, thus stimulating her growth even more.
The thing is that trying to use ScrOG as a way to manage the canopy was a joke. Before the flowering stretch was over in the thirteenth week from seed (or the fifth week of flowering), the tallest branches were already past the COBs of my DIY LED light. They were entangling themselves in the wiring and actually touching the ceiling.
Thankfully, these uppermost parts of the plant – despite being in shadow – filled out at the same or even better rate as the rest, probably because of the apical dominance.
Rather Wispy Flowers, But the Whole Tent Was Full of Them
The first preflowers appeared rather soon for such a long-flowering Sativa – within two weeks from the 12/12 flip. However, they remained in basically the same state for many weeks to come – mostly hairs and no calyxes.
Only in the sixth week of flowering did I see the buds stack up.
As I made clear in my Dr Grinspoon diary, her buds didn’t exactly fill out and get fat. Instead, they foxtailed, shooting new calyxes on top of old ones.
By this time, heat became a real problem, which obviously contributed to the foxtailing. However, Dr Grinspoon is a tropical plant, so she didn’t seem to mind the heat or the high humidity (60%).
Unfortunately, these humid and hot conditions invite spider mite infestations, which find a way into my grow room every time. I had to constantly drench the medium with neem oil to keep the infestation in check. Many leaves were showing bite marks, but luckily, I saw no dreaded webs.
By the way, starting from the sixth week of flowering, I used Grotek Pro-silicate, which is a rich source of potassium and silicon. I believe that this supplement helped Dr Grinspoon cope with the heat. I also changed the diet to everano Flower Power Bloom and Foliar, which are more suitable for the budding stage.
In weeks 9 and 10 of flowering, I additionally used a PK booster, and in the twelfth week, switched to a totally different formula – Green House Feeding Long Flowering. They say this nutrient line is perfect for strains with an especially long flowering period, such as Dr Grinspoon genetics.
The buds kept forming and packing on weight, and some of them (but not all) were covered with trichomes. Even after several rounds of defoliation and pruning, the whole volume of my grow tent was now a crazy criss-cross of branches – topped, bent, and supercropped – going in every direction.
A Dense Rainforest
In the final 4 or 5 weeks of flowering, the vegetation in my grow tent got so impenetrable, I had trouble inspecting the buds for signs of maturity or the presence of mold and bud rot. The latter was a serious problem now, because the RH was still 60% and I couldn’t do anything to keep it down.
I had to remove a couple of affected spots to stop the bud rot from spreading. I also started to sample the buds, snipping one off here and there, and in the fifteenth week of flowering began flushing with Advanced Nutrients Flawless Finish.
After a week-long flush, I proceeded to harvest the colas, starting from the most mature. By the end of week 16 from 12/12, the whole Dr Grinspoon had been harvested, and I got 403 grams total of dry bud.
The buds were super airy and trimming was a nightmare, but the product itself was fire – I couldn’t wait to finish this Dr.Grinspoon grow journal and sharef. It smelled of citrus essential oils and produced a very strong, heady high that lasted for several hours.
Dr Grinspoon Review Takeaways
Dr Grinspoon feminized seeds allow you to harvest a very generous amount of connoisseur quality buds, although to get there, you’ll have to wait many, many weeks (24 in my case). Her size could really become an issue, so don’t hesitate to start topping her early on and treat this as the main method of canopy management. Don’t use a very big pot to further curb the growth, and start the plant after a very short veg or use the 12/12 from seed method.
I hope you found my Dr Grinspoon strain review helpful. Happy growing, everyone!
Herbies Head Shop expressly refuses to support the use, production, or supply of illegal substances. For more details read our Legal Disclaimer.





Thank you for leaving a comment for us!
Your feedback will be posted shortly after our moderator checks it.
Please note that we don’t publish reviews that: