


Mimosa Evo Grow Diary: A Sticky Smelly Half-Pound Beast

Hello, everyone! Let me share with you my Mimosa Evo grow diary. This was my first-ever photoperiod strain, and it was a breeze to grow from start to finish. My only regret is not having taken clones, but it doesn't matter, I’m buying a new batch of Mimosa Evo seeds. I’m sure I’ll find another keeper.

I gave my Mimosa Evo by Barney’s Farm long veg and topped her three times to turn her into a large plant with multiple colas. She grew without any issues, smelled insanely strong in flower, and yielded close to 9 ounces of premium bud, trim, and finger hash. And the smoke was fire.She definitely became my number one weed genetics, and here’s why.

The Vegetative Stage of my Mimosa Evo Grow
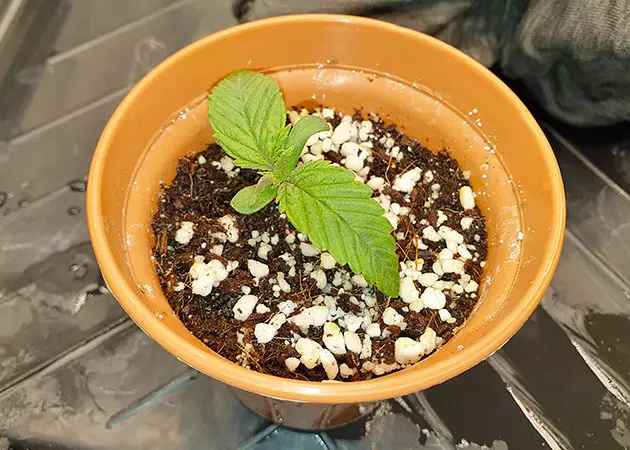
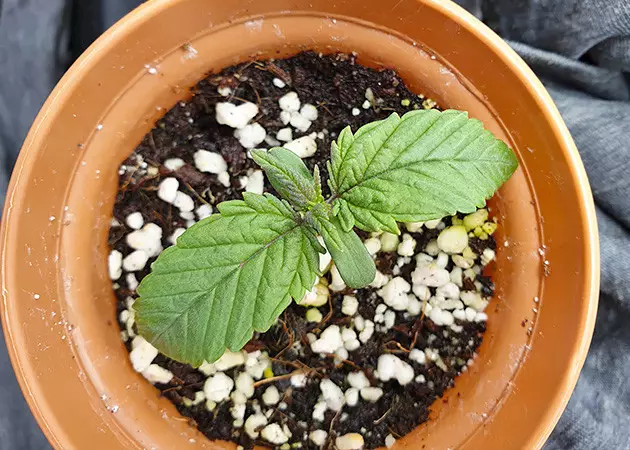
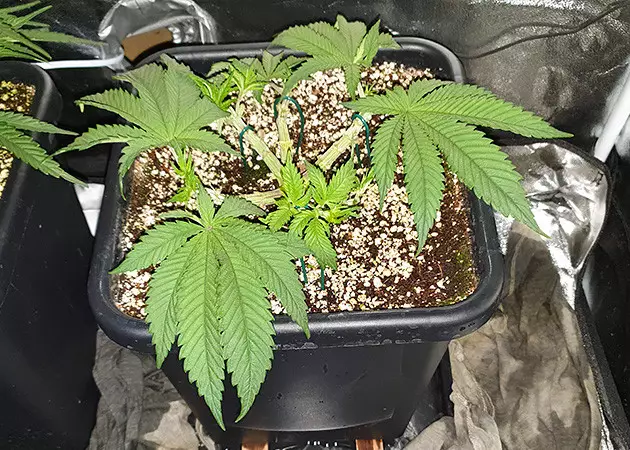
I soaked one seed for 12 hours, then kept it between wet paper towels for 24 hours, and put the sprout into a tiny starter pot filled with a coco/perlite mix. In another 48 hours, my Mimosa Evo came up, and after 9 more days, she was big enough for me to transfer her into the final 15-liter (3.96-gallon) AutoPot.Compared to a pair of autoflowers that I germinated at the same time, she had a too light shade of green but was growing quickly enough. She had incredibly broad Indica-type leaves from the start.
Frequent Fertigation

I started giving her Greenleaf Nutrients Mega Crop from week 1. Of course, very little amounts at first. I must say I loved this nutrient because this is a one-part formulation that you can use from seed to harvest, so even a novice grower can do it. Whenever she started to look pale green, I would up the dose of Mega Crop, and the color would come back to normal.
I also added Vitalink Cal Mag to the mix in week 5. Besides calcium and magnesium, this nutrient contains iron and also has some nitrogen — perfect for the vegetative stage.
I was hand-watering my Mimosa Evo 4 times a day: at first 500ml in one go and then 750ml. I was making sure to see up to 20% runoff. In the first couple of weeks, this frequent fertigation made the girl look constantly overwatered, but when she got older and had a strong root system, symptoms of overwatering were gone for good.
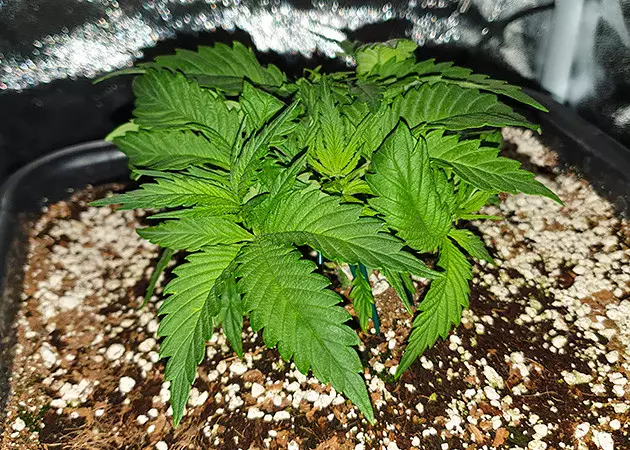
In week 3, I temporarily moved Mimosa Evo (and two other plants) into a smaller 1’x2’ tent equipped with a rather weak pinkish LED light. She would eventually go back into the main 3’x3’ tent for flowering.
Mimosa Evo Training Schedule for the Whole of the Veg

I knew I had all the time in the world to give my plant the shape and size I wanted because this was a photoperiod strain and I could keep her in veg indefinitely. As a result, my Mimosa Evo grow was quite long — 12 weeks of veg and 7 weeks in flower. This is her whole training schedule:
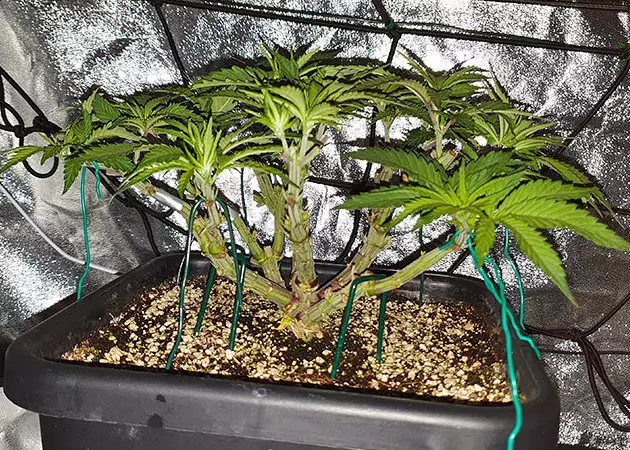
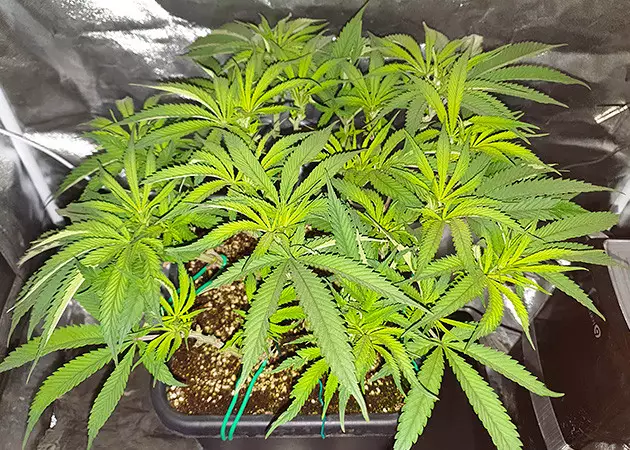
- week 4, topped her above the third node, with 6 equal-size branches as a result,
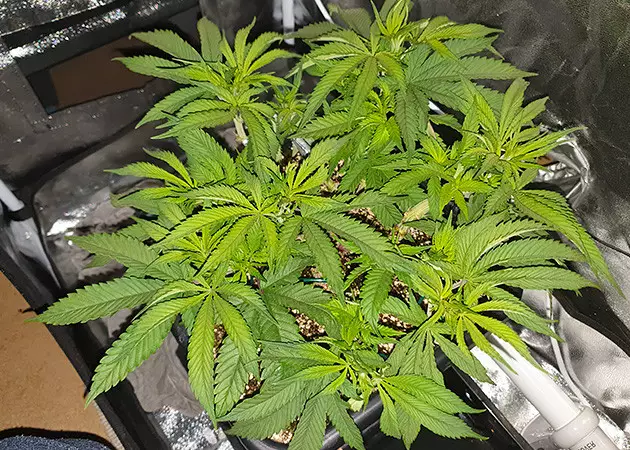
- week 5, heavily defoliated all six, leaving only some growth on the tops,
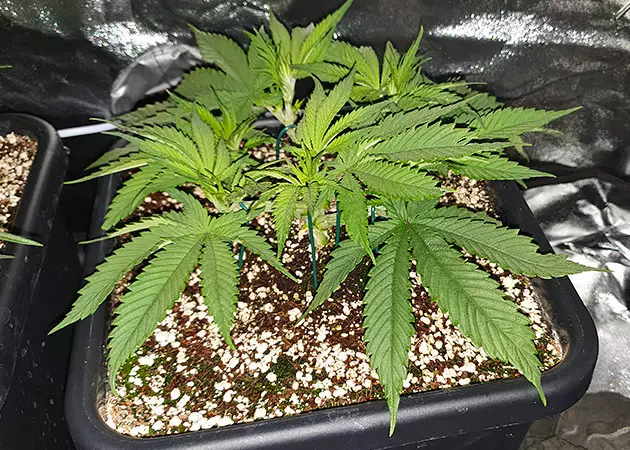
- week 6, another topping above the 3d node for every branch; got 12 of them now,
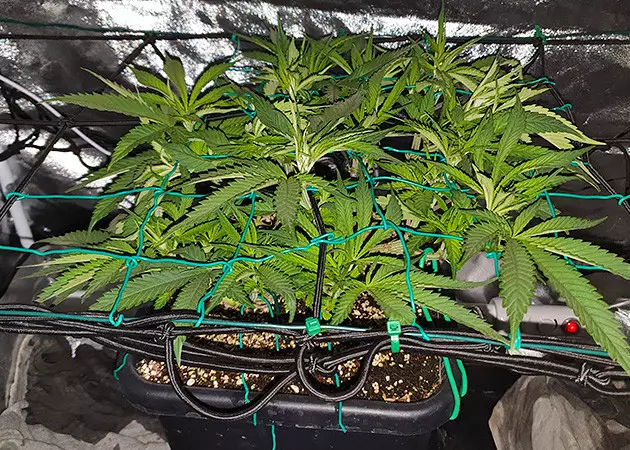
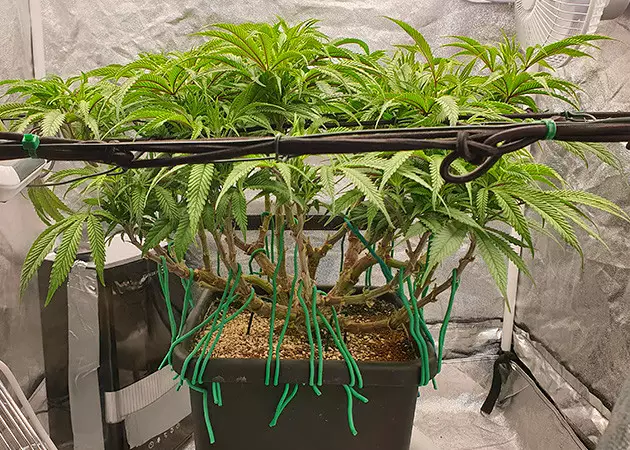
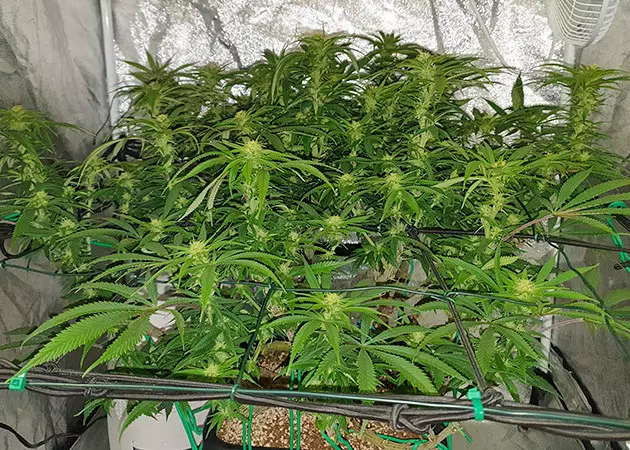
- week 8, one more topping resulting in 24 branches; also installed a ScrOG,
- week 11, extremely severe defoliation, with almost no foliage left.
The girl would bounce back every time and rather quickly, no matter how hard I trained her.
I probably should have had a strategy for the canopy management from the start, like mainlining or something, because my Mimosa Evo was constantly trying to become a tangled mess. But, by watching her closely, I managed to keep the canopy even and the lower part clear, if a bit disorganized.
Trying to Keep the Perfect pH
During this Mimosa Evo grow, I have given up using a pH pen. I had three, and all of them were showing different readings. And no calibration helped. So I started using strips, cutting them in 3 parts each so that they would last longer.
The strips have an accuracy of only 0.5, but this was more than enough since I knew that in coco you should aim for 5.5-6.0 in veg and just above 6.0 in flower. Frankly, it’s accurate enough to grow weed.
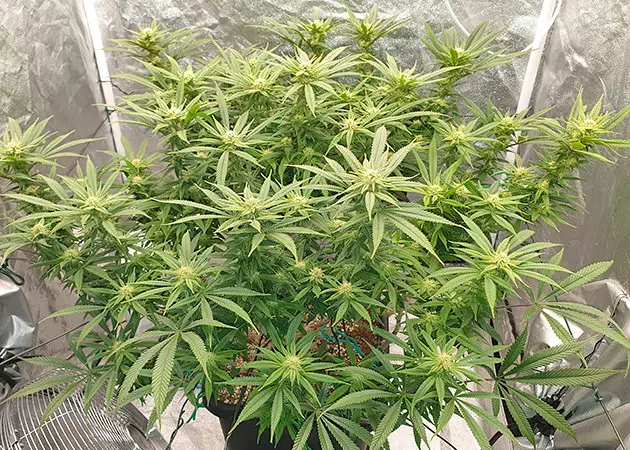
The Last Weeks of Veg
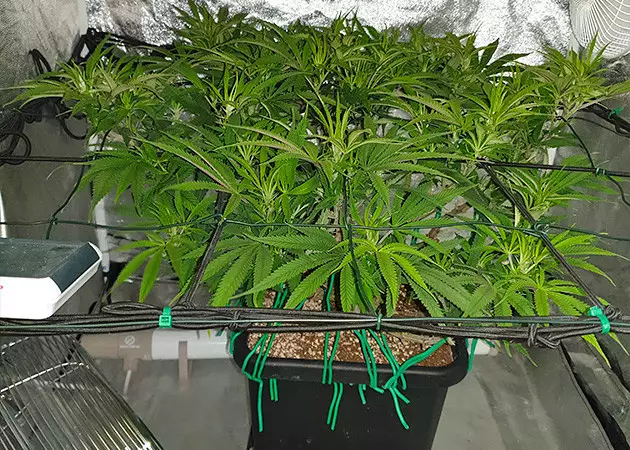
In week 11, the two autos (that I germinated on the same day that I started the Mimosa Evo grow diary) finished flowering, and so I had the bigger 3’x3’ tent free. I dismantled the ScrOG in the smaller tent, moved my Mimosa Evo into the bigger one, and installed a new ScrOG net there.
And in week 12, I made the 12/12 flip, so that week 13 would be the first one of flower.
The Flowering Stage of Mimosa Evo Grow Diary
As my Mimosa Evo grow entered into its flowering stage, I changed the light schedule so that I would have the lights-on period during the day and lights-off during the night. Otherwise, the summer weather and the heat generated by the light would be too much.
Btw, I used an excellent ultra-thin Kingbrite LED quantum board drawing 480W from the socket, and starting from the second week of 12/12, it was blazing at the maximum power.
I also appreciated, for the first time, how convenient autoflowers were compared to photos. Because now I had to make sure to cover every little indicator light on the equipment inside the tent so as not to interrupt the darkness during the ‘night’ hours.
I Added Flowering Nutes and Upped PPM
I started giving my Mimosa Evo Greenleaf Nutrients Bud Explosion which is a source of extra P and K and recommended for use both at the start of the flowering stage and closer to the finish. I would go on using it till harvest, gradually decreasing the dose of Mega Crop (nitrogen), and especially sharply when the flowering stretch was slowing down to a stop in week 16.
Additionally, I briefly used another source of phosphorus and potassium 4 weeks into flowering, namely Plagron PK 13/14. And, as I said before, I now kept pH at about 6.2 to help my Mimosa Evo with the uptake of these two flowering nutrients. I had also raised EC to 2.1 (1050 ppm) by this time. Never had fed my autoflowers that much, but I thought that photoperiods can deal with a richer diet.
Btw, since the girl moved into her forever home, I stopped watering her by hand. Now, I was using my Autopot system. It makes use of gravity to automatically fill a tray—in which the pot stands—with the nutrient solution as needed. And the coco medium in the pot wicks the solution up right into the root zone.
Canopy Still Needs Attention
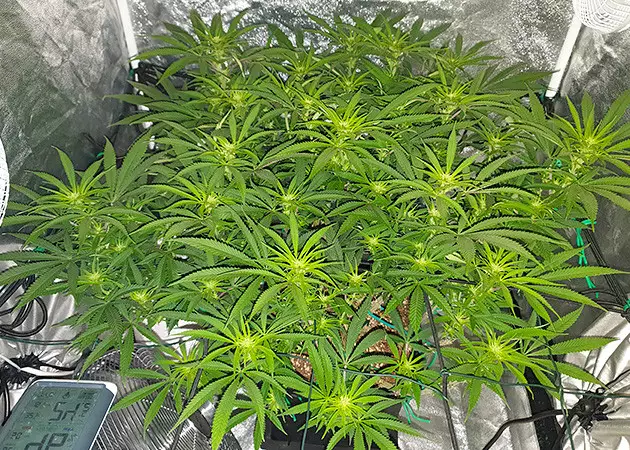
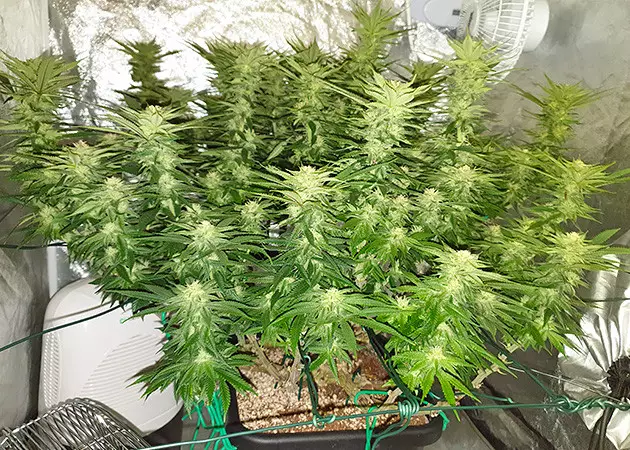
At the beginning of the budding stage, I only had to remove some foliage below the net, But in week 16, I couldn’t keep up with the stretch and had to remove the ScrOG altogether. I had a wire running around my tent, so I pulled the side branches down and outward with hooks and secured them to this wire. Just to open up the canopy and improve light penetration.
For the same reason, I kept defoliating my Mimosa Evo but only slightly. Just bits and pieces here and there.
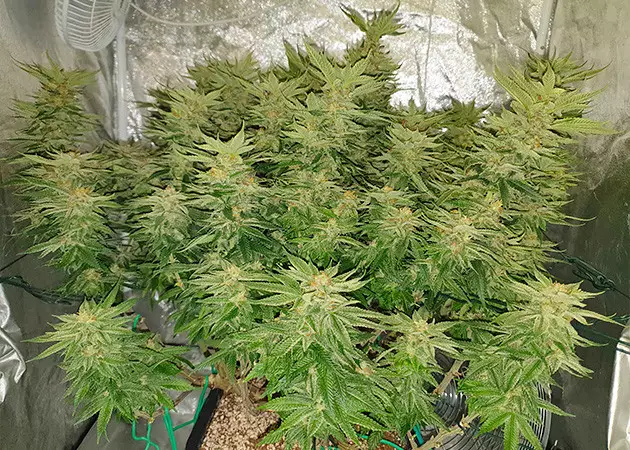
The plant started to smell incredibly strong and looked frosty. She also became very sticky to the touch. The buds were swelling up like balloons all the way to the harvest. And by the time I decided that my Mimosa Evo grow should be over, even the lower buds had 95% cloudy trichomes and 5% amber. As for the top ones, the ratio was more like 50/50.
Main Takeaways from my Mimosa Evo Grow Diary
It was hands down my favorite plant to grow, absolutely hassle-free, with no issues, not even a sign of heat stress. She brought me over 7 zips of top-shelf bud, another 1.5 oz of larf/trim for edibles, and almost 6 g of finger hash. The stuff had the strongest smell imaginable, like a bunch of oranges bathed in glue, and it carried into the taste. The potency was just as powerful.
I made the veg deliberately long so that she could completely fill the tent. A better idea would probably be to germinate 4 Mimosa Evo seeds and grow them SOG-style. That could have brought in the same or better yields but with much shorter veg. It’s an idea for the next time though.
Wishing you all the best, guys! Happy growing!

Herbies Head Shop expressly refuses to support the use, production, or supply of illegal substances. For more details read our Legal Disclaimer.
- Shared on Twitter
![icon]()
- Shared on Facebook
![icon]()


Thank you for leaving a comment for us!
Your feedback will be posted shortly after our moderator checks it.
Please note that we don’t publish reviews that: