Tutankhamon Grow Report: My First Attempt to Grow These Genetics Indoors

Hi all! Here I want to describe my second Tutankhamon grow. My first brush with these genetics from Pyramid Seeds was in a greenhouse. It was successful in all respects, but the high-yield potential of the strain played a trick on me – the buds were too large and solid and I had problems with mold. The second go with Tutankhamon seeds was much more successful.
This Tutankhamon grow took 15 weeks and produced 111g of rock-solid buds. The plant was strong and vigorous. Some deficiencies along the way were probably due to the subpar nutrients. Read on for my full Tutankhamon grow report.
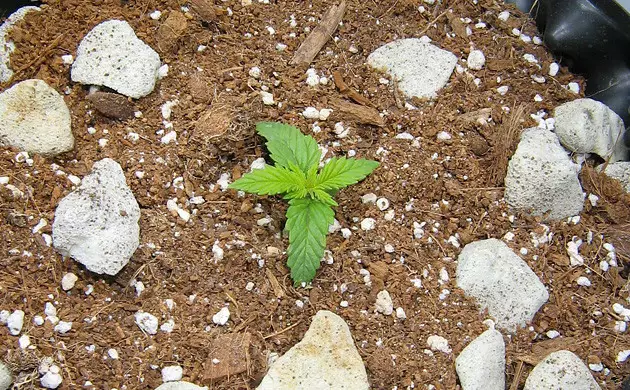
Tutankhamon Grow: Germination, Seedling Stage & Veg
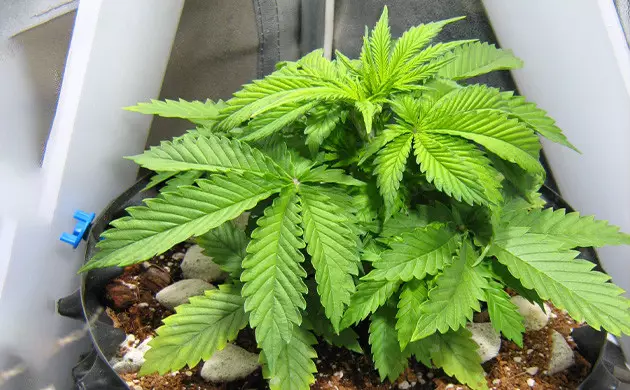
I decided to play it simple and put the seed straight into the final container – the 12-liter (3.17-gallon) airpot. For those of you who don’t know, the unique design of airpots increases the oxygenation of roots and prevents them from circling, which ensures maximum plant health.
For this Tutankhamon grow, as well as others, I re-used the same soilless medium that consists of the following three components:
- Coco coir (40%). Optimal water retention.
- Foam glass (40%). Provides mechanical support and stabilizes pH.
- Perlite (20%). Creates ‘air pockets’ for roots to breathe.
I put the airpot into my tiny Secret Jardin HS40 grow tent (40x40cm, or 16’’x16’’) under my custom LED light that draws 150W. The light schedule for veg was 18/6.
Some More Numbers
Throughout veg, I tried to keep stable conditions: my night temperature was the same at 20°C (68°F), and the day temperature started at 26°C (79°F) and increased only insignificantly over time to 29°C (84°F) – all within the optimal range. The only issue was the relative humidity of the air. At 40%, it was perfect for the later stages of flowering, but too low for the seedling and the vegetative stages.
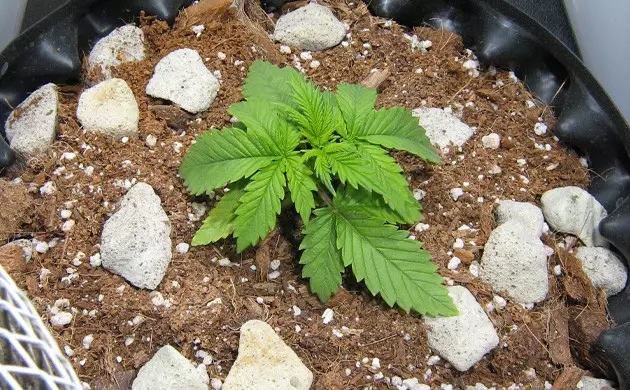
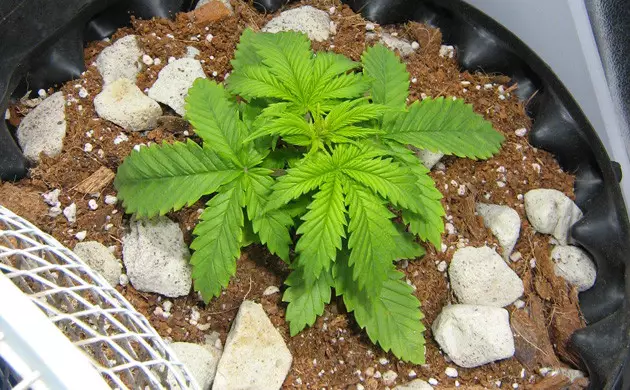
My Tutankhamon stayed nice and compact. I even decided to increase the distance from the light to make her stretch a bit. At the beginning, the LED was at 35cm (12”), but I later raised it to 45cm (18”).
I kept the pH at the same 6.0 for the whole of the veg (it’s the maximum allowed for a soilless mix or hydroponics), but increased the amount of water from 200ml to 1.5 liters (0.4 gallons) a day as the plant grew. I also slowly upped the EC of the solution from 200ppm in week 2 to a steady 780 starting from week 4.
My girl thanked me for my efforts with vigorous growth and good looks. Her leaves might have displayed a too-light shade of green, maybe even to the point of chlorosis on the lower vegetation, but I wasn’t worried.
I let my Tutankhamon grow naturally for almost five weeks, but LSTed her heavily on day 29. The idea was to have many equal-sized colas. On the same day, I started to gradually shorten the ‘days’, and from day 32 onward, the light schedule was 12/12.
Tutankhamon Grow: Flowering Time & Harvest
It was a surprise to me that my Tutankhamon would take so much time to show the first flowers on the tops. Only after 2 full weeks of 12/12 could I finally say that the budding stage had begun. Now it would be a short and sweet 9-week ride downhill all the way to harvest.
However, by the beginning of flowering, the plant looked a bit tired and the yellowing of the lower leaves progressed. When I started to defoliate – which I did all through the middle of flowering – the problem progressed higher up. Obviously, some of the mobile nutrients were missing (magnesium? Potassium? Both?), so my Tutankhamon was sucking the life out of the lower leaves first.
I was using Green House Feeding Hybrids Powder at 1000ppm. This is a one-component formula, meaning it can be used both during the vegetative phase and the flowering stage. However, the ease of application may have the risk of deficiencies as a trade-off.
Yet Another Deficiency
In week 12, I introduced Booster by the same manufacturer to provide extra amounts of phosphorus, potassium, magnesium, and all necessary micronutrients. I was covered in this respect now, but another problem emerged – the leaves in the middle would twist, burn at the tips and edges, and get brittle. It was probably the calcium deficiency this time – not uncommon in coco. Raising the pH to 6.4 didn’t help matters.
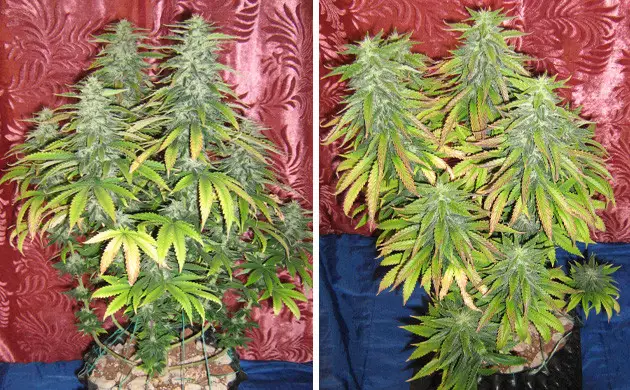
My day temperature wasn’t optimal either – now 30°C (86°F). The heat is known to exacerbate problems with calcium deficiency.
Despite this, my Tutankhamon grow chugged along: the buds kept stacking up and swelling, and when I sometimes removed the plant from the tent, the smell was outrageous. Not in the tent itself though – my carbon filter did a fine job.
Two Fertigations With Ripen And The Final Flush
In week 13, my Tutankhamon got nothing but GHE Ripen as the final high dose of P and K, and then it was time to give her only pH-balanced water. Just regular amounts – the same 1.5 liters (0.4 gallons) she was receiving daily through most of the grow.
I would have given her only 1 week of flushing if she was mature enough, but she’d take one week longer than the specs said, so it was a two-week flush for her.
The colas kept filling out and got very heavy and dense. I finished my Tutankhamon grow when 80% of trichomes were milky and 20% amber. All in all, it took me 15 weeks:
- 4 weeks of veg
- 2 weeks of transitioning
- 9 weeks of flowering
Final Thoughts
For me, this strain was great. Despite the fact that the colas were so big and solid, I saw no sign of mold. It meant I retained all my buds, which ended up weighing in at 111g (3.92oz) dry. To put this into perspective, it was 0.74 grams per watt and almost 700g (24.5oz) per square meter.
Funny thing: my Tutankhamon Auto that I grew next would bring me even more.
That’s it. Thanks for reading! I hope you enjoyed my Tutankhamon grow report
Herbies Head Shop expressly refuses to support the use, production, or supply of illegal substances. For more details read our Legal Disclaimer.




Thank you for leaving a comment for us!
Your feedback will be posted shortly after our moderator checks it.
Please note that we don’t publish reviews that: